
Site personalization in WordPress

Introduction
Site personalization can provide a better and more personalized user experience to visitors based on their context. Components in the WordPress site can be tailored to the visitor according to the state of the incoming visitor or visitor behavior on the site. Read till the end to learn about site personalization in detail with a practical use case example of a site built on WordPress.
In an earlier post, we had introduced the fundamentals of site personalization. In this post, we will take a specific usecase and see how to implement it in WordPress.
The Usecase
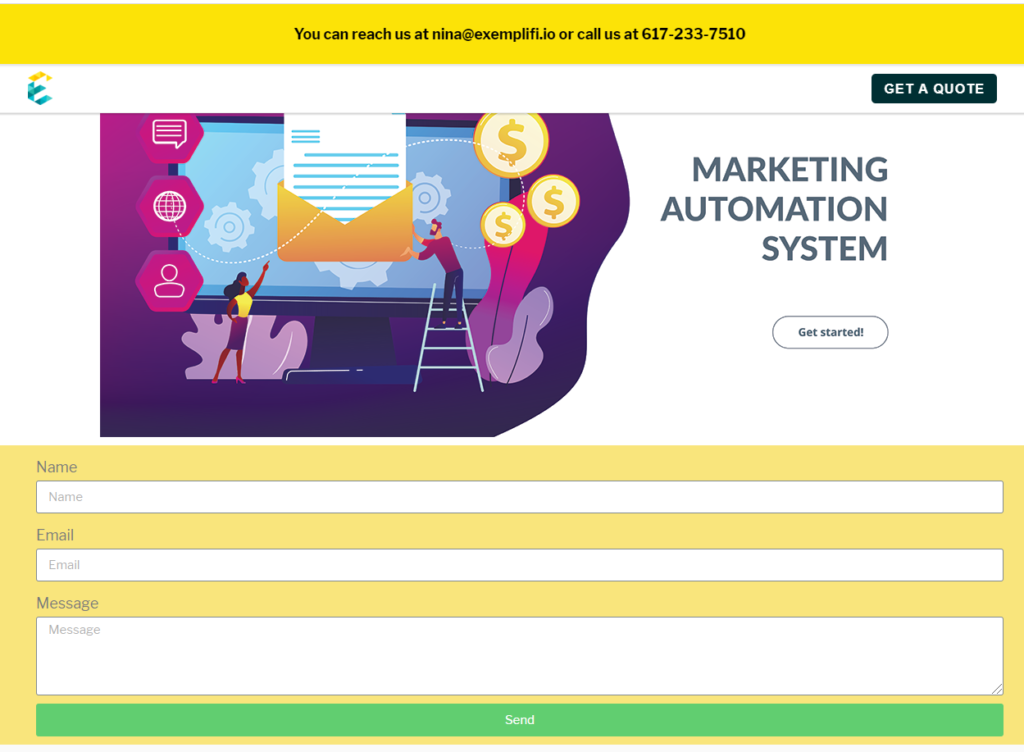
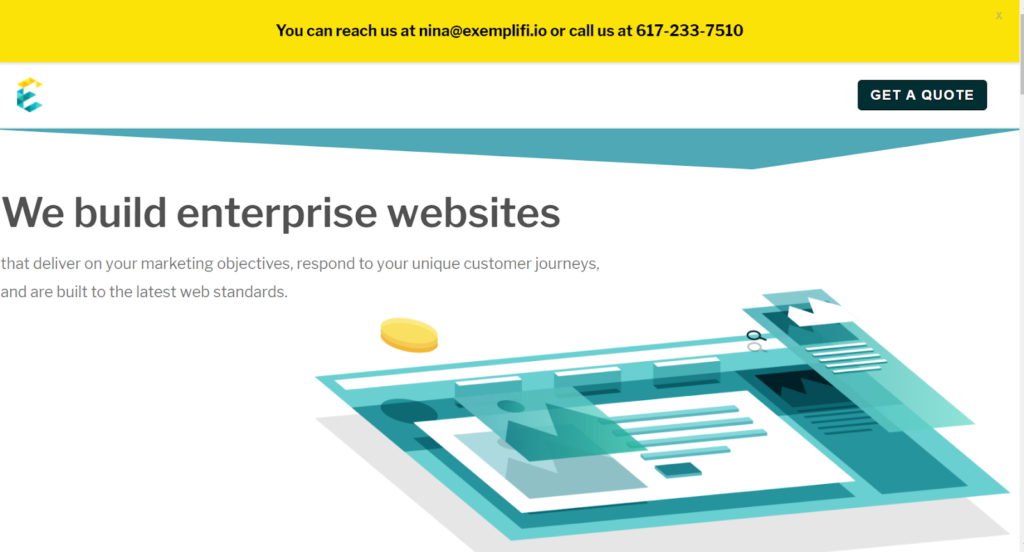
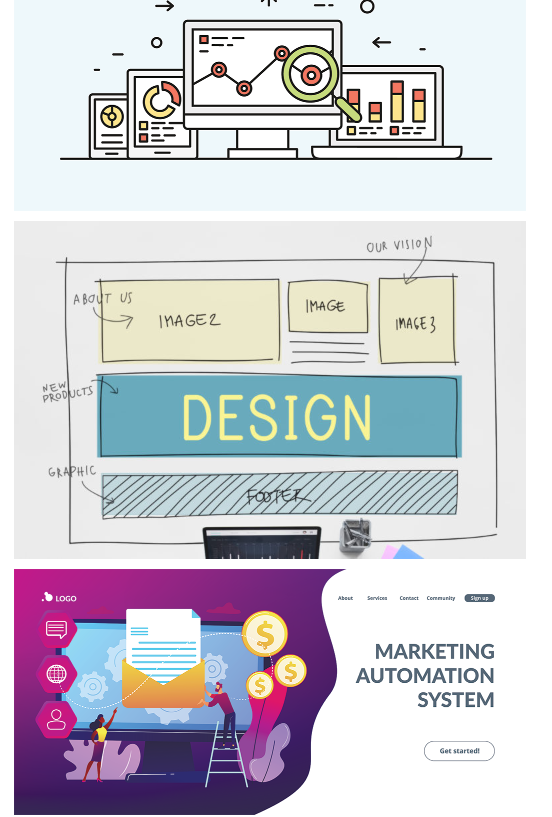
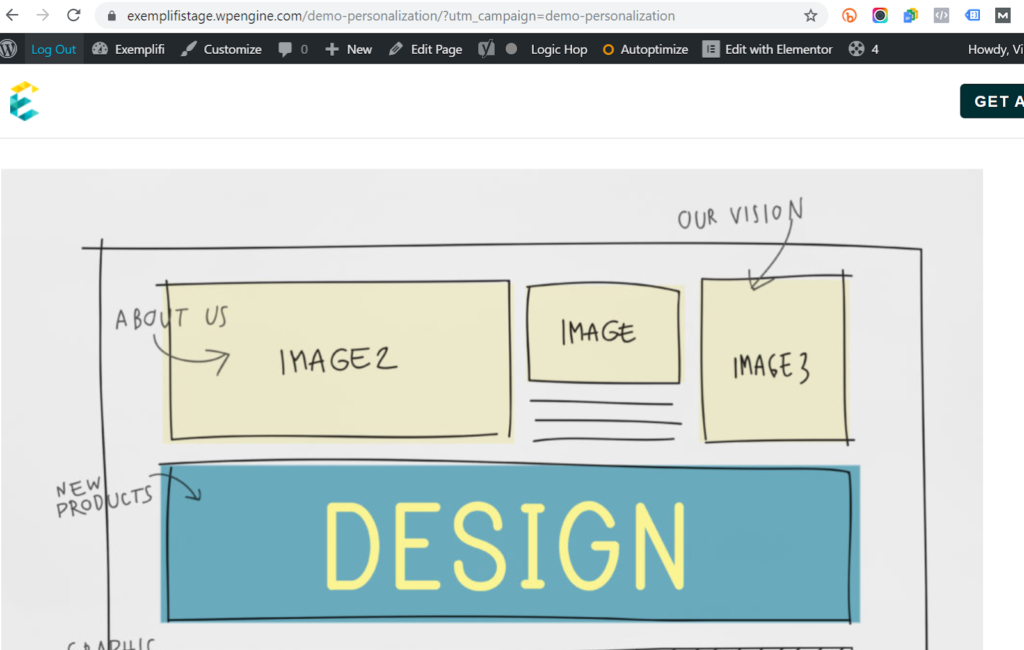
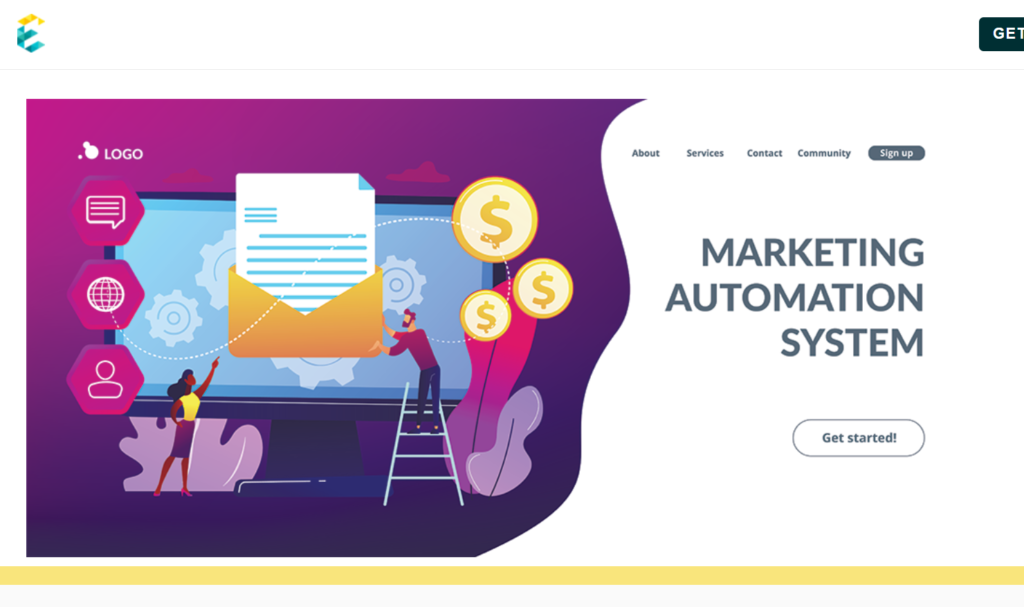
We will build a page that looks like below
A good way to think of personalization is as follows:

The first personalization will illustrate how to personalize based on the state of the incoming visitor. So, we will show the bar at the top only to returning visitors but not to new visitors.
The second personalization will also illustrate how to personalize based on the state of the incoming visitor — but for many other conditions. The image on the page will change based on the following conditions:
Default

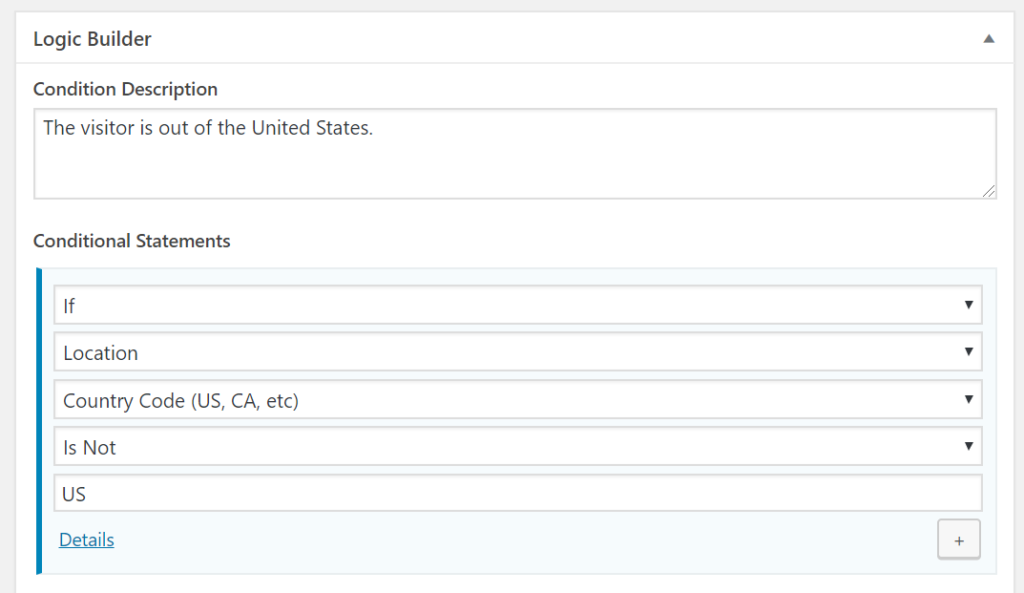
User comes in from outside the USA

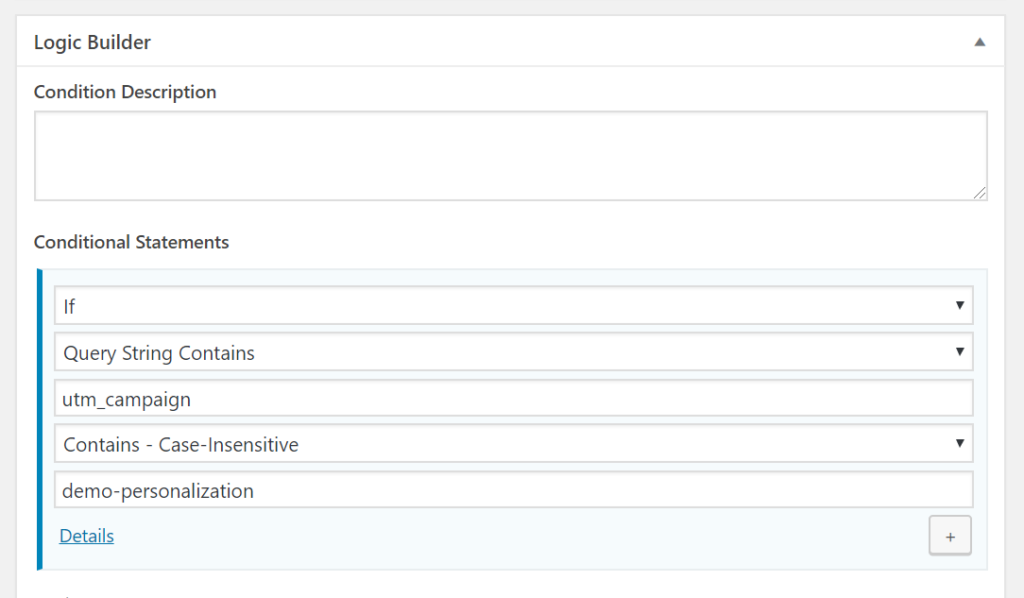
User clicks on a campaign that has utm_campaign=demo-personalization in the URL
Finally, we will illustrate how a visitor’s action on the site will update his “prior state” and impact his experience when he comes to the site again. The user comes to the site, fills out the form and leaves. At this point, we update the “lead status” of the visitor on our side. He then comes to the page again. This time around, he does not see the form.
Page Component Design
In an earlier post, we talked about how websites are comprised of components that are organized hierarchically. For eg., the most basic elements would be things like colors, typography, links, buttons, lists and such. These elements are then grouped in larger components such as forms, modals, carousels and grids. Personalization essentially means that — based on the context — these components can be turned on/off or certain variants will be shown instead of the regular component. (Eg. Blue button instead of the default red button).
We will build these components in WordPress using Elementor. See how at https://www.exemplifi.io/insights/design-system-elementor
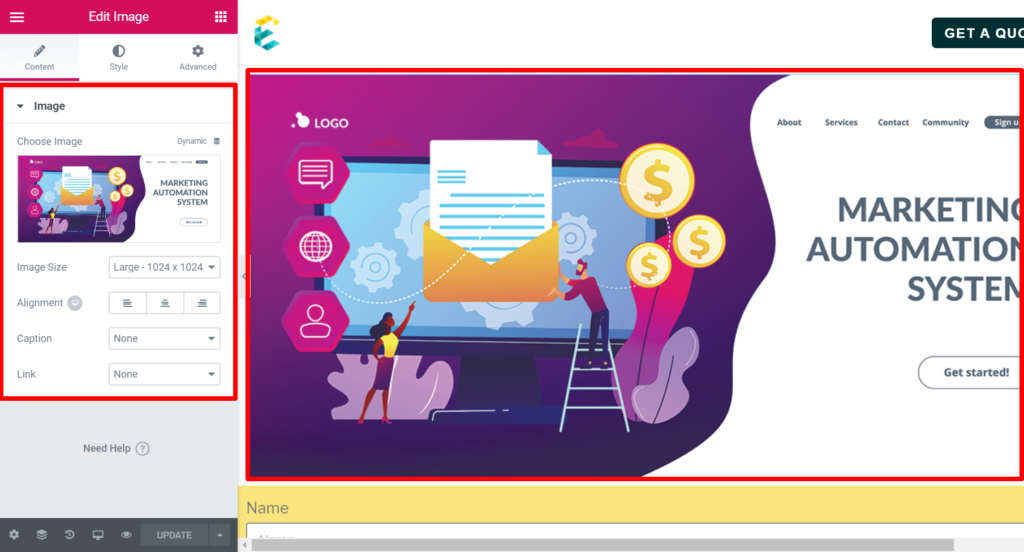
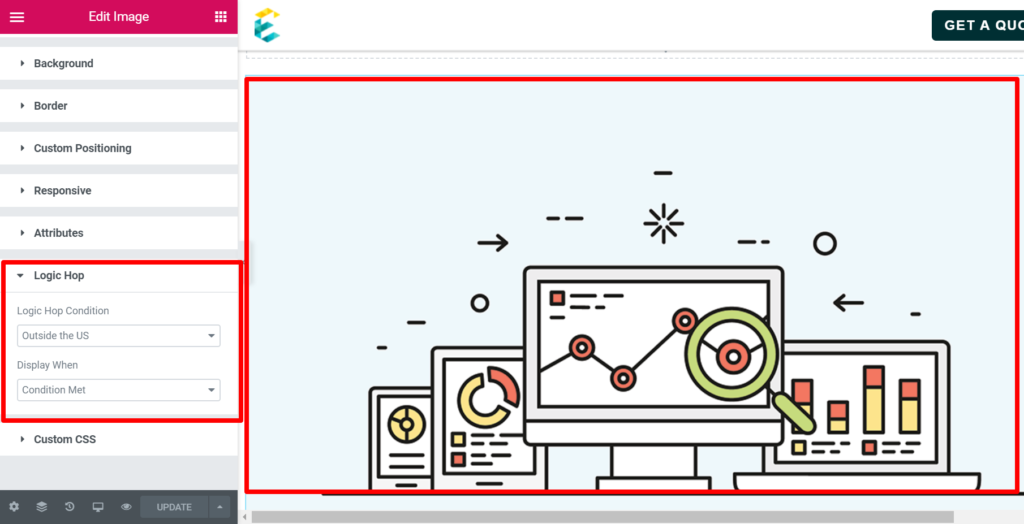
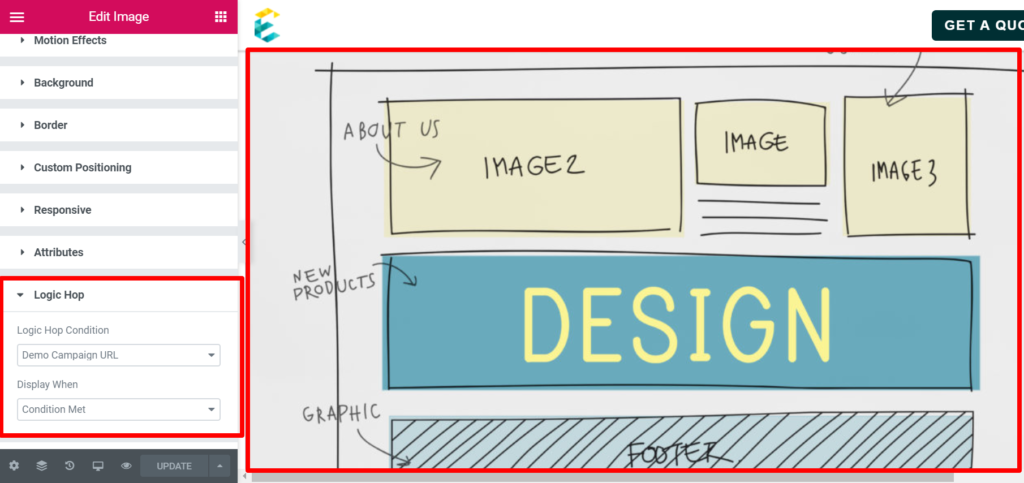
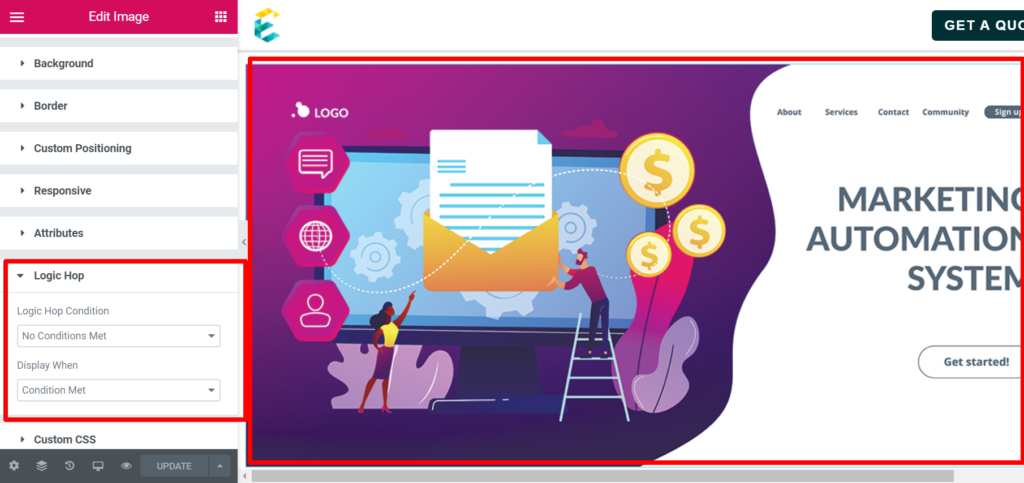
The image component is built with Elementor as shown below:
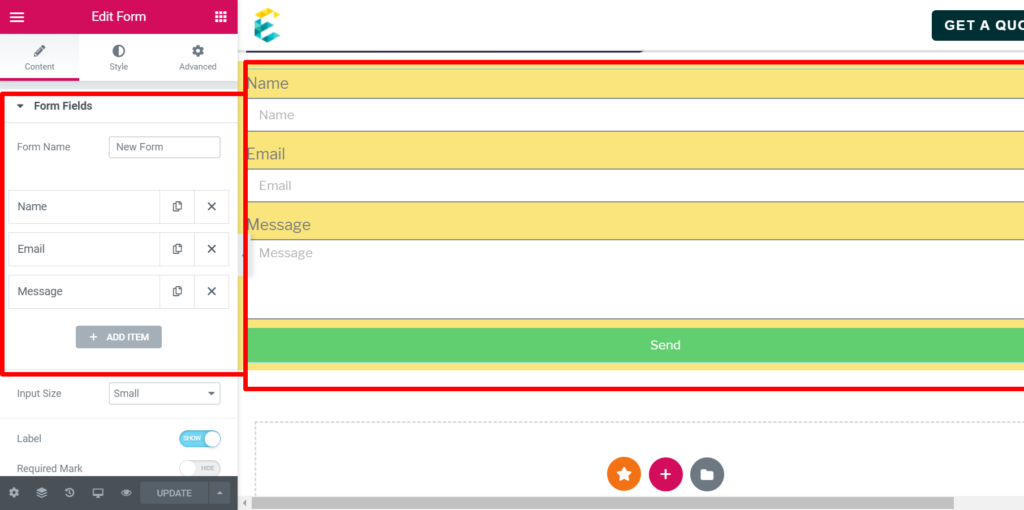
The form component is built as shown below:
Personalization First Scenario
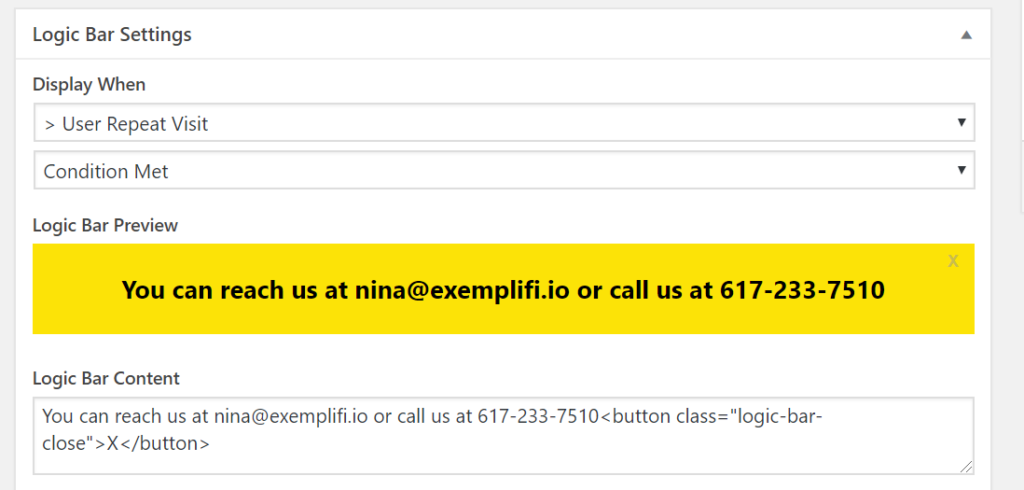
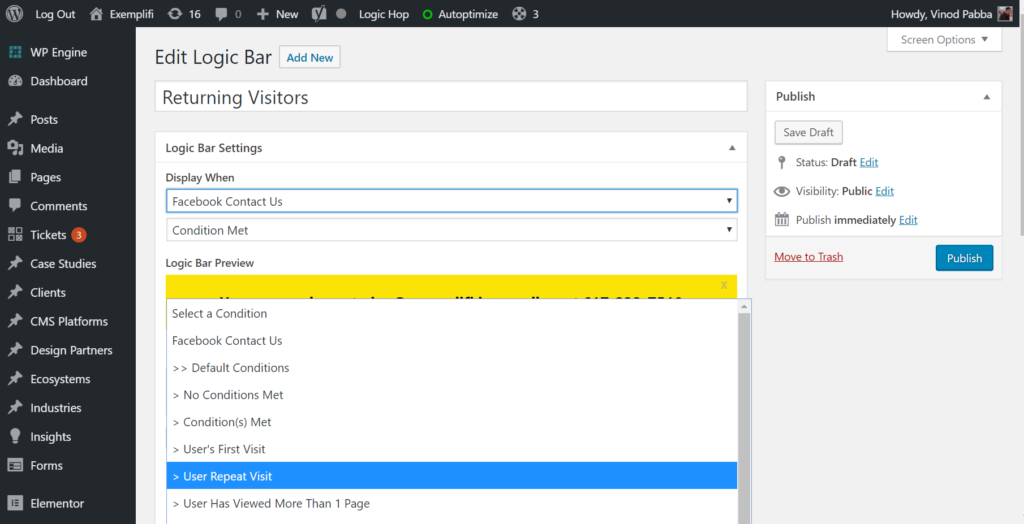
To implement personalization, we will use a product called LogicHop. It implements the popup experience as a “logic bar”. You can create a logic bar component and then associate it with a set of conditions. This logic bar will show up only when the conditions are fulfilled.
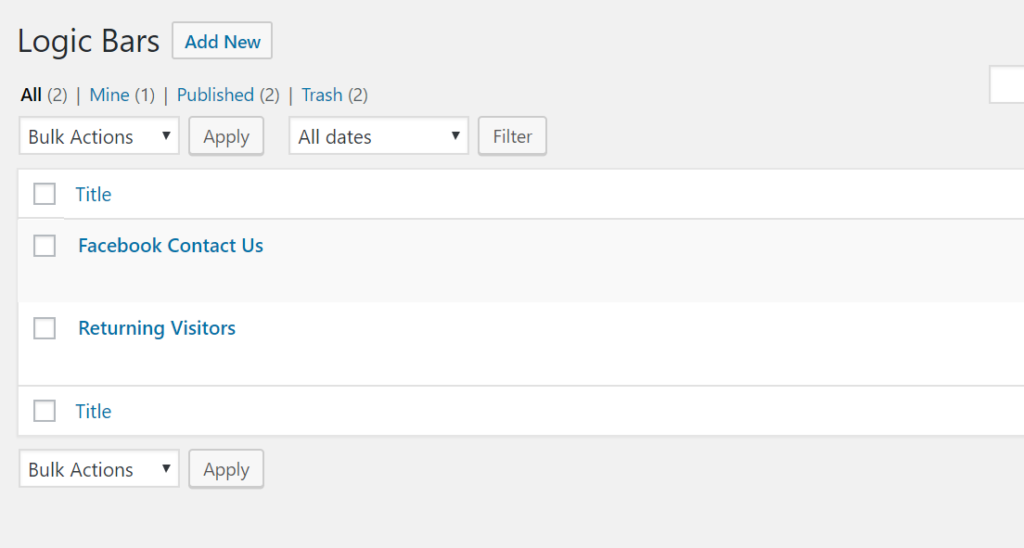
We create the logic bar and select the condition that it should show up only for returning visitors.
You can see this in action here. When you go to the site for the first time, you don’t see the bar
When you go to the site again, you will see the bar
Personalization Second Scenario
The logic table for this scenario would look like below:
Image to show →

User comes in from outside the USANOYESNOUser clicks on a campaign that has utm_campaign=demo-personalization in the URLNONOYES
The “Outside the US” condition is implemented as shown below:
And the condition for when a user clicks on a campaign that has utm_campaign=demo-personalization in the URL, is implemented as follows:
We then create three sections with an image in each, as shown below:
For the first image, we attach the “Outside the US” condition
For the second image, we attach the “Demo Campaign URL” condition
The final image has no conditions attached to it and shows up only when none of the conditions above are true.
To see the first condition in action, we use a tool called BrowserStack that lets you mimic requests from different countries:
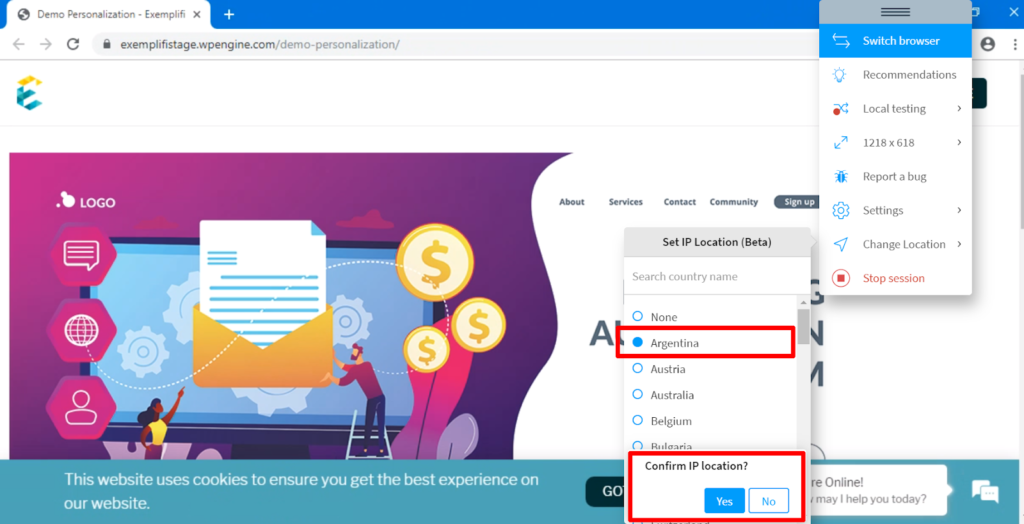
And as anticipated, when the request comes in from outside the US, the correct image shows up:

And when the incoming URL is /?utm_campaign=demo-personalization, you see the relevant image:
Personalization Final Scenario
As described earlier, we will illustrate how a visitor’s action on the site will update his “prior state” and impact his experience when he comes to the site again. In this scenario, the user comes to the site, fills out the form and leaves. At this point, we update the “lead status” of the visitor on our side. He then comes to the page again. This time around, he does not see the form.
The steps we will follow to accomplish this are the following:
- Set up a goal that updates the lead score of the user when he submits the form
- Setup a condition that is connected with this goal.
- Associate this condition with the form module. When this condition is triggered, the form module is not shown.
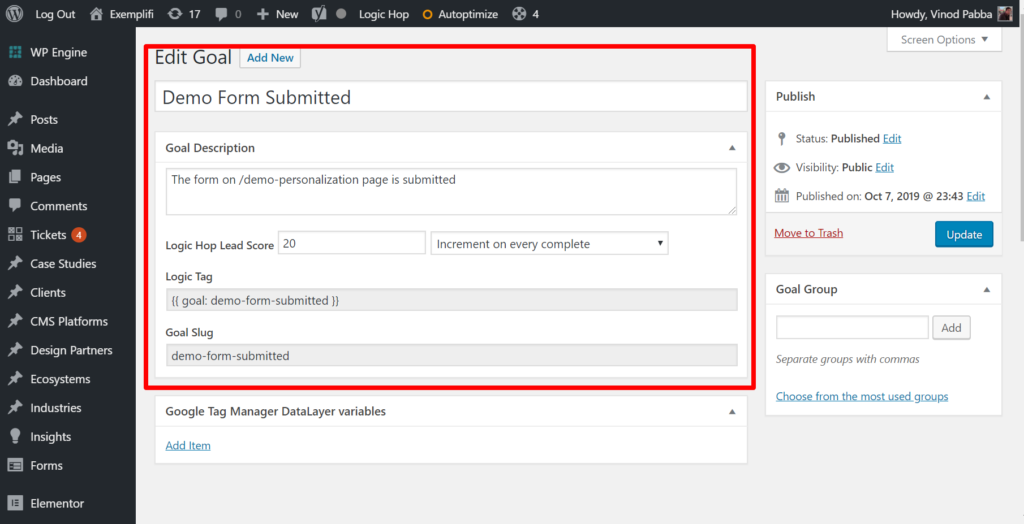
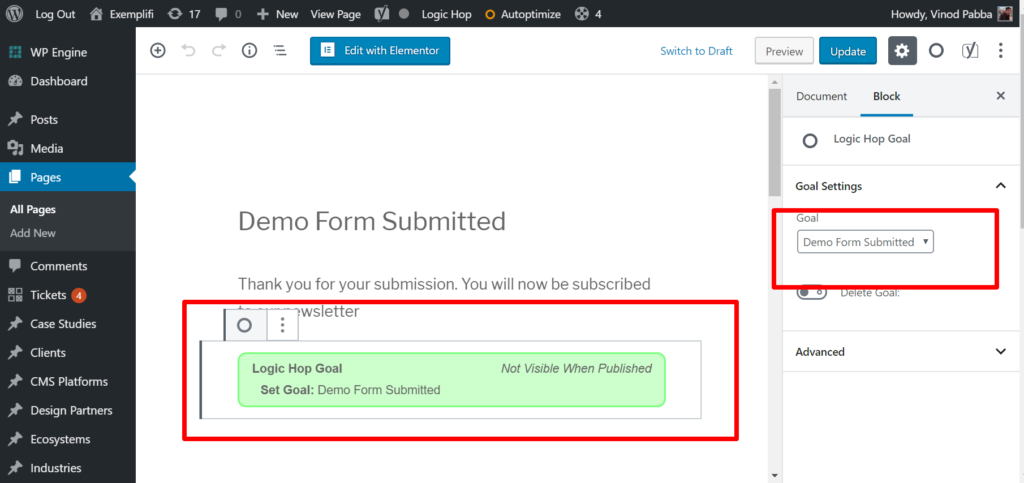
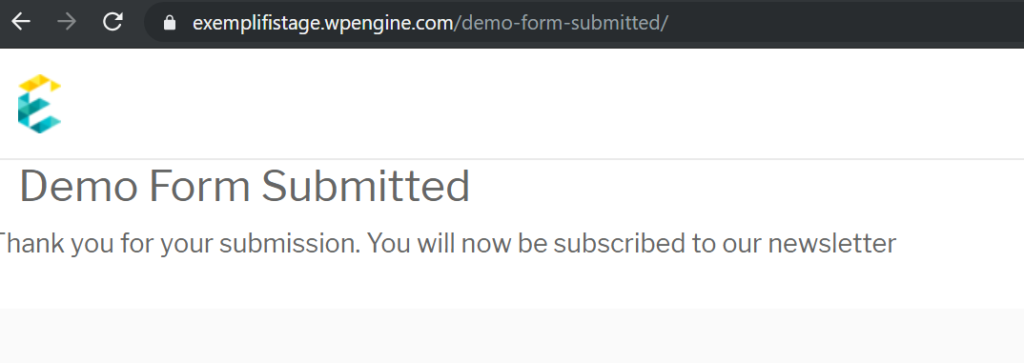
When the form is submitted, it redirects the user to a thank-you page titled /demo-form-submitted/. We create a goal that updates the lead score by 20 when the form is submitted and the user is directed to this page:
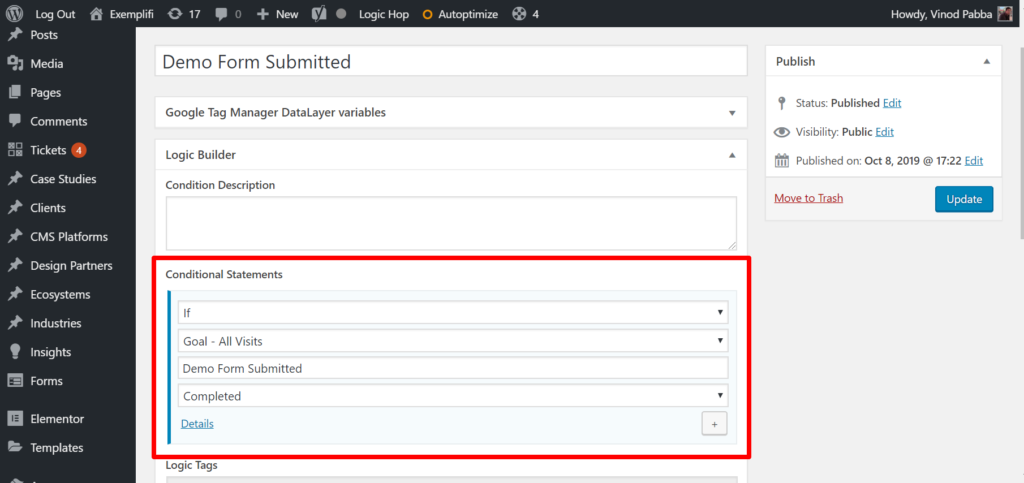
We then create a condition that executes when this goal is achieved:
Finally, on the page, we associate the form with this condition:
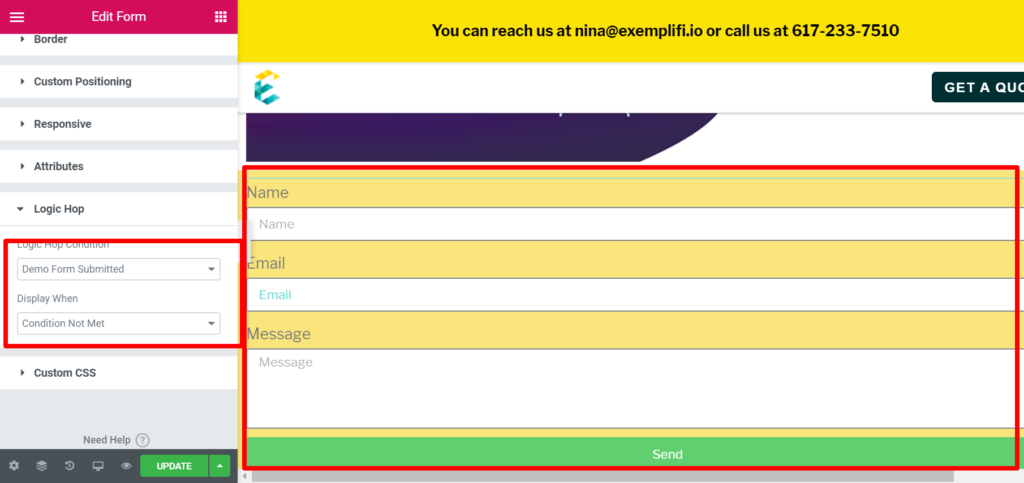
Essentially we are saying that this form should be shown only when the goal is NOT hit.
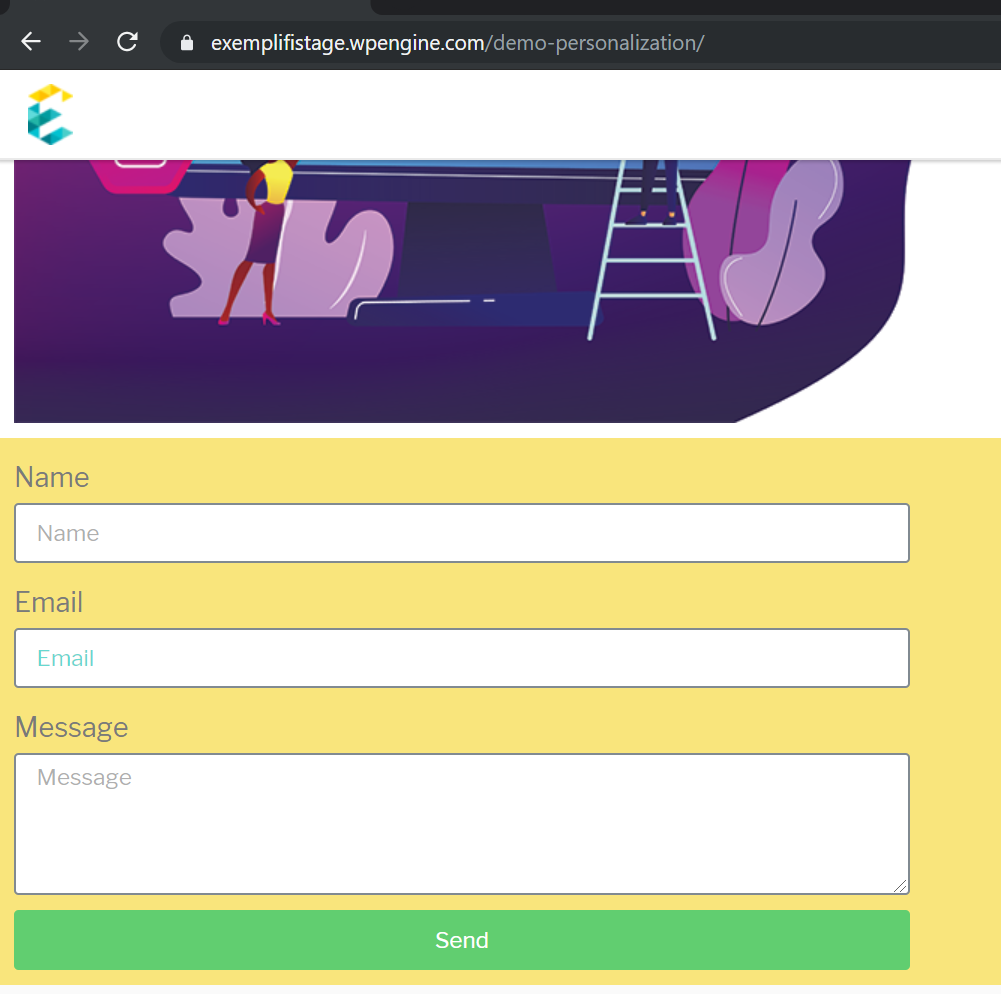
To check this in action, when you go to the demo page for the first time, you will see the form.
After you submit the form you get directed to the Thank you page, which triggers the goal to be executed and updates the lead score of the user:
When you go to the main page again, the form does not show:
It was a long article and we hope it was worth the read!