Step-by-Step Guide to Setup Kentico on Azure

Introduction
This article provides a step-by-step guide to setting up Kentico on Microsoft Azure, covering the use of Azure Resource Manager for deployment, creating an SQL database, configuring firewall rules, and deploying Kentico administration. Read further to dive deep into continuous deployment options, backup features, and necessary configurations for a successful setup, ensuring scalability and security.
Introduction to Azure and Kentico
Microsoft Azure
Azure is a complete cloud platform that can host your existing applications and streamline new application development. Azure can even enhance on-premises applications. Azure integrates the cloud services that you need to develop, test, deploy, and manage your applications, all the while taking advantage of the efficiencies of cloud computing.
Kentico on Azure
Kentico Xperience is a premier .NET based CMS. It supports hosting in both Microsoft Azure App Services Web Apps and Virtual Machines. We will prefer the Azure App Service as Azure Web Apps are quick to create and easy to set up and manage. It’s no surprise the value of time in App build is very valuable.
Azure App Service
Azure App Service enables you to build and host web apps, mobile back ends, and RESTful APIs in the programming language of your choice without managing infrastructure. It offers auto-scaling, security and high availability, supports both Windows and Linux, and enables automated deployments from GitHub, Azure DevOps, or any Git repo.
Setting up Kentico on Azure
Use Azure Resource Manager to create a deployment environment
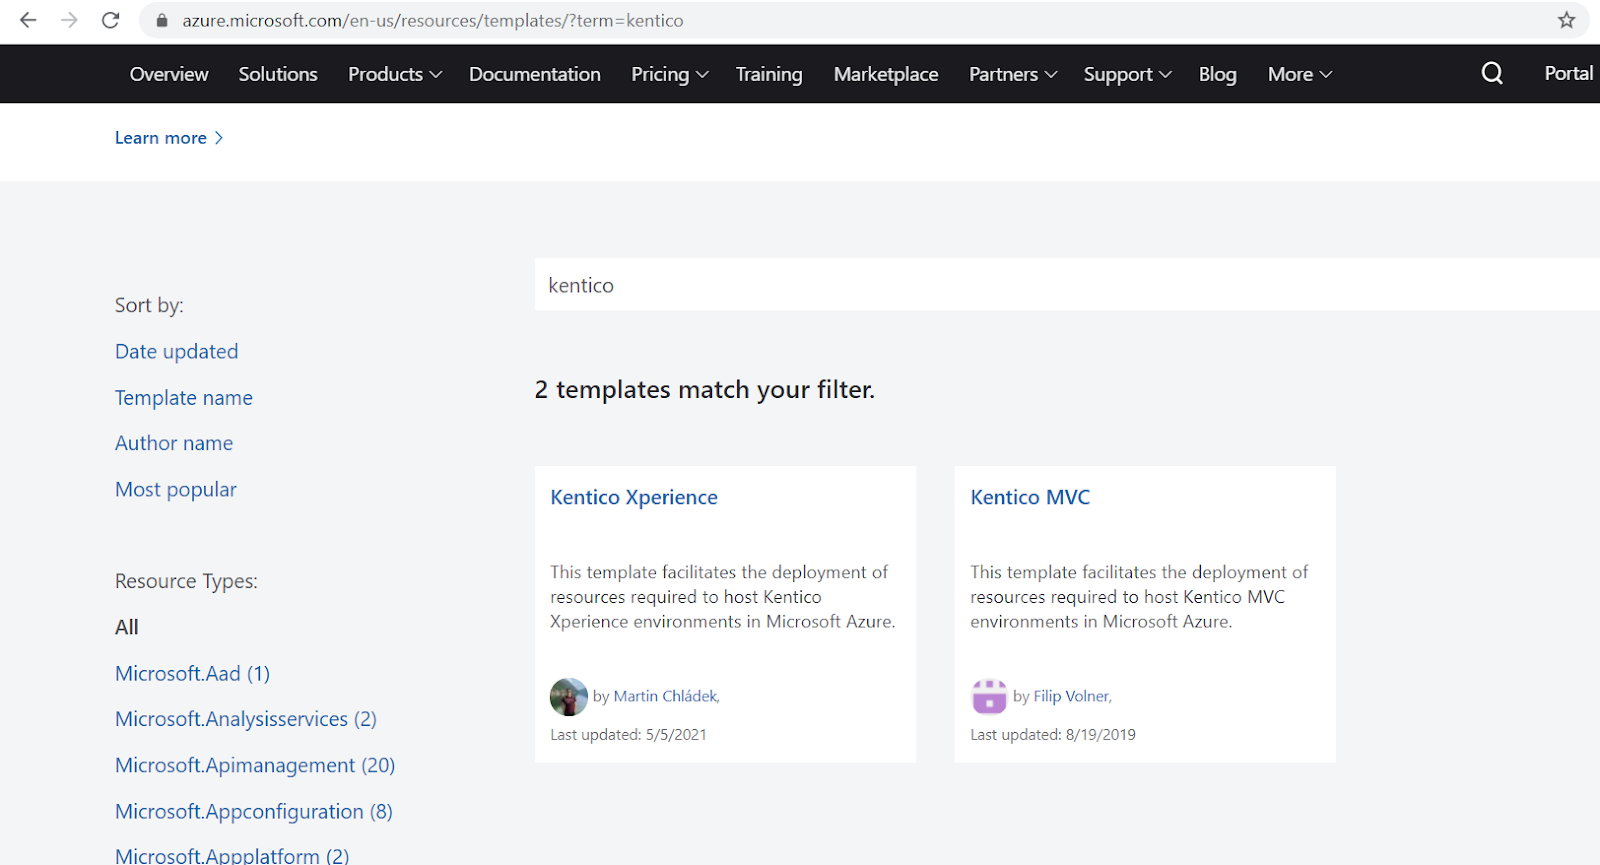
- Open Microsoft's Azure Quickstart Templates repository and search for Kentico Xperience.
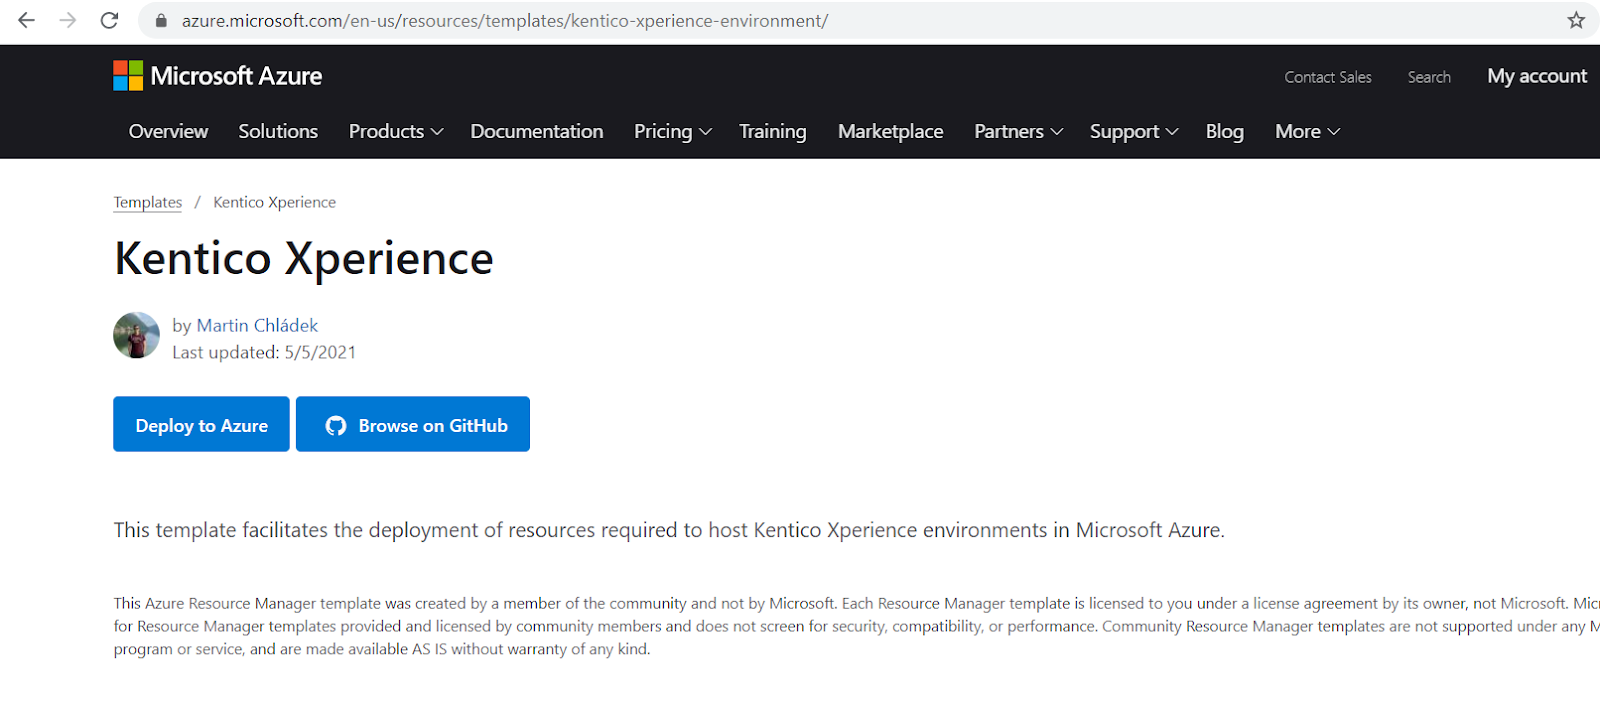
2. Open the Kentico Xperience template and click Deploy to Azure at the top of the page.
3. Select your Azure subscription, resource group, and resource location.
4. Provide the information required to deploy Azure services used to host your environment.
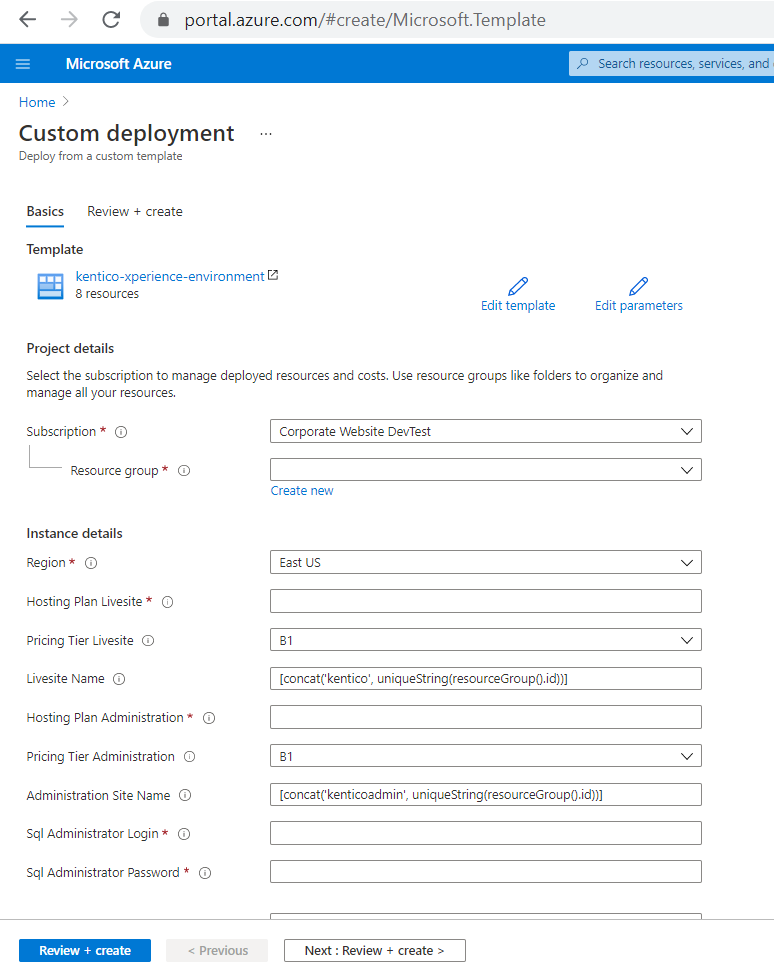
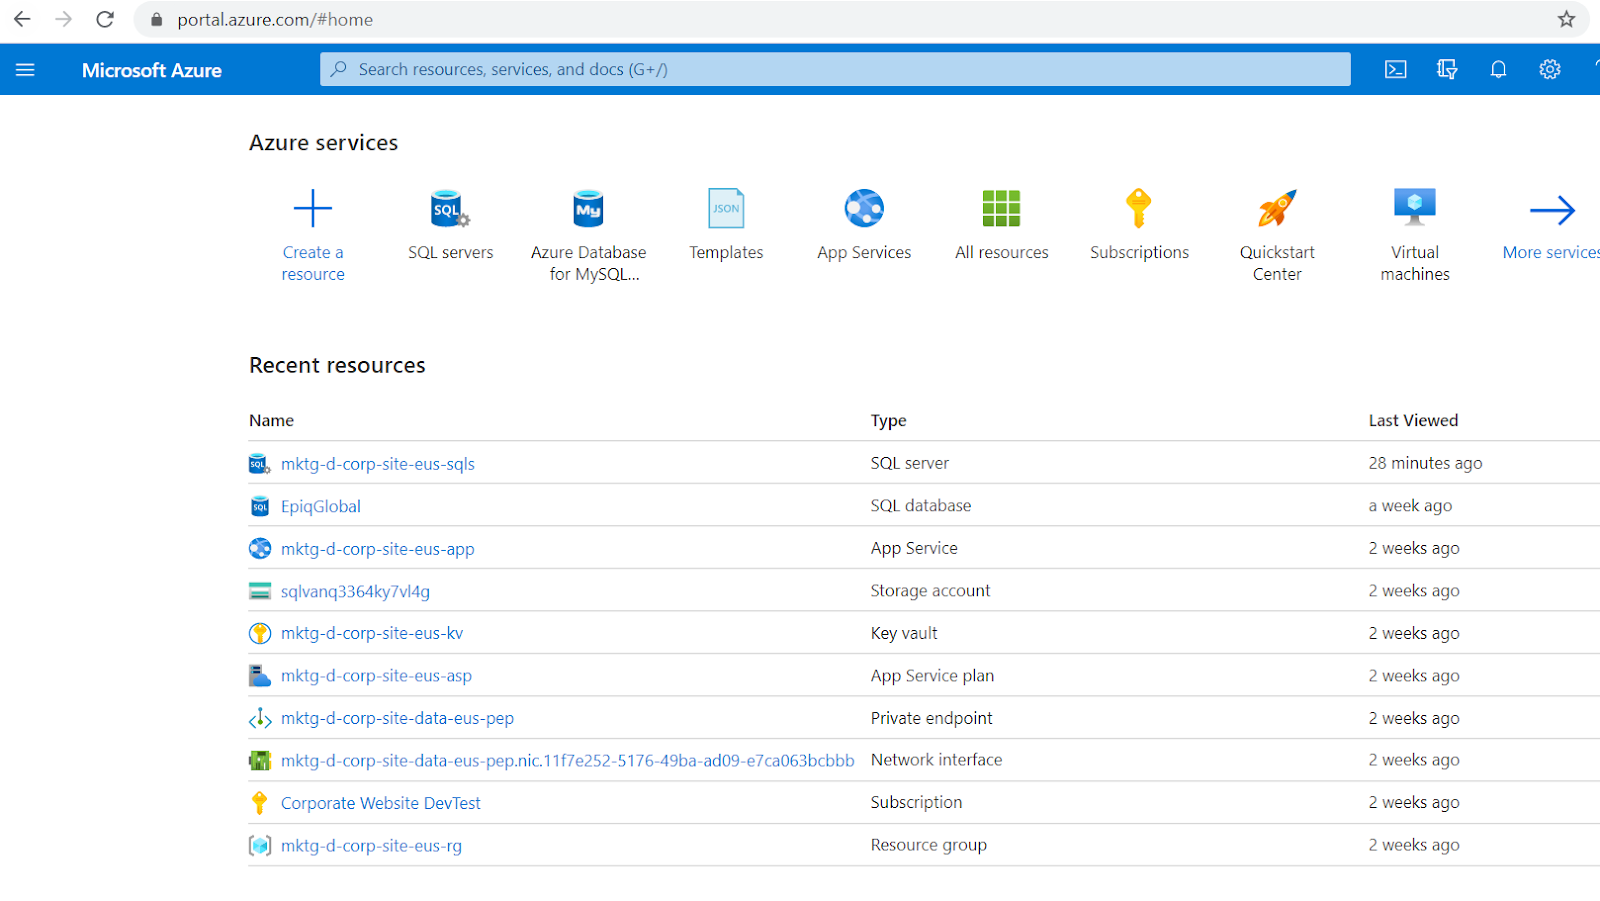
5. Click Review + create and finish the template deployment. Now you can see all the created resources as shown below
Deploying the project's database to Azure SQL
You can host your project in Azure Web Apps and keep your database in a standard Microsoft SQL server. However, we recommend that you also move your database to Azure to ensure the best performance:
- Open the Azure SQL server deployed by the template in the Azure portal.
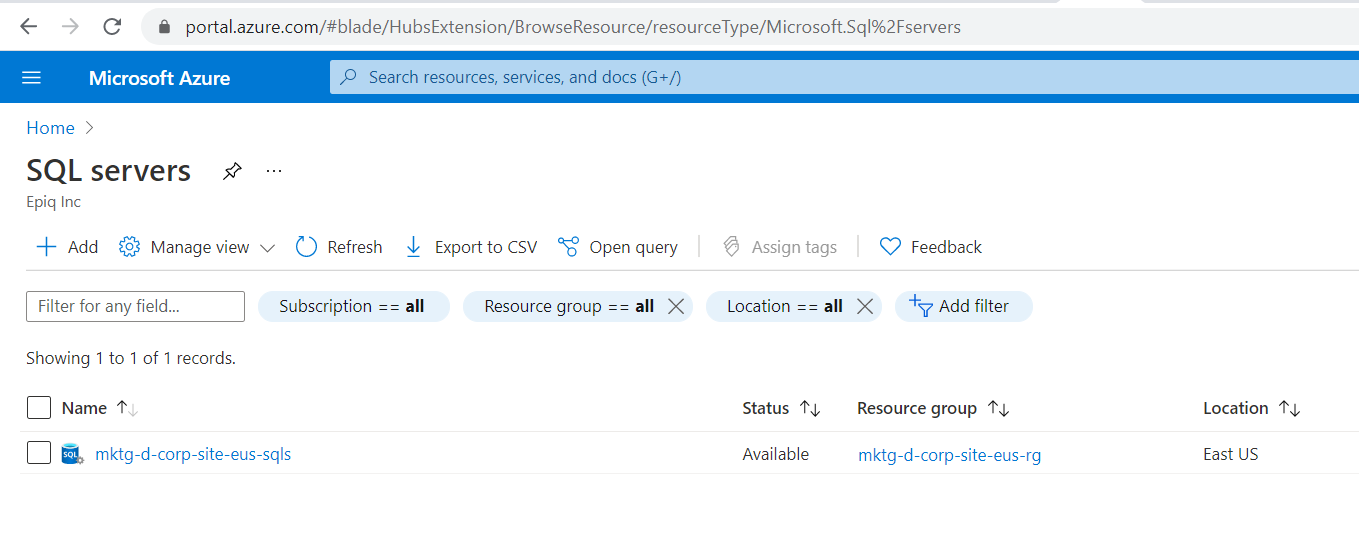
- Click New database and:
- Specify the database name.
- The database name should match the one you specified in the Connection String Database Name setting when deploying the ARM template. If you left the setting empty, you need to manually add database connection strings to the created Web Apps.
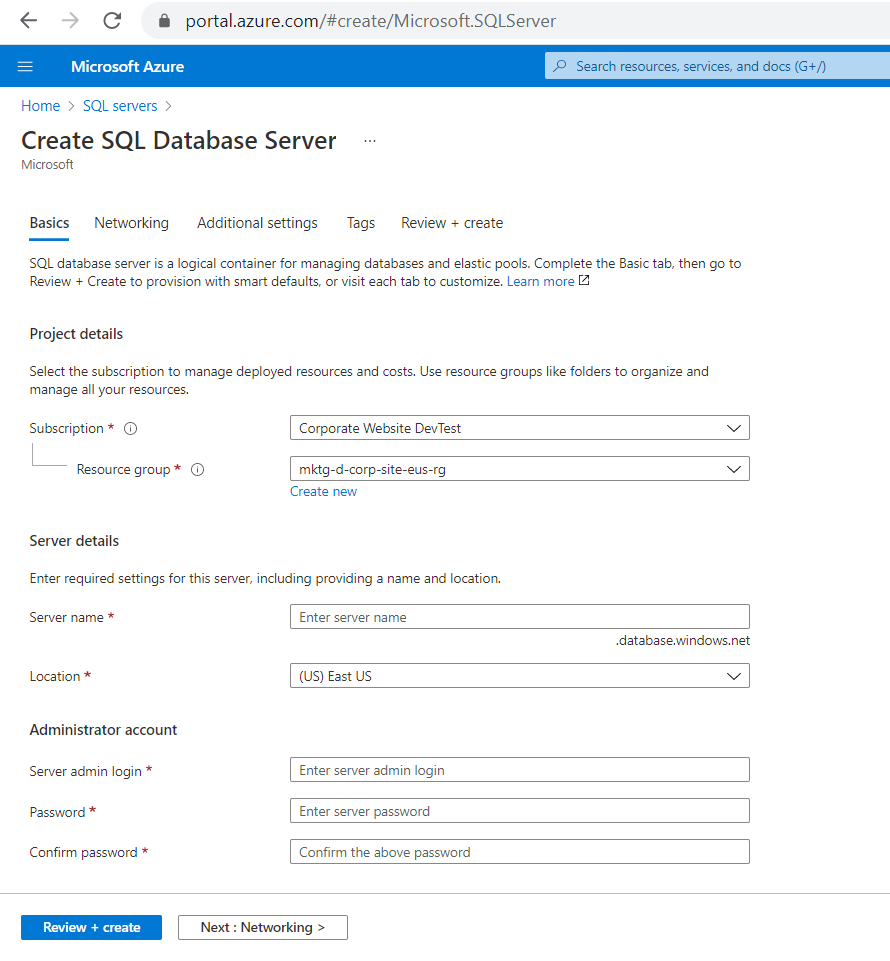
- Review and create the database
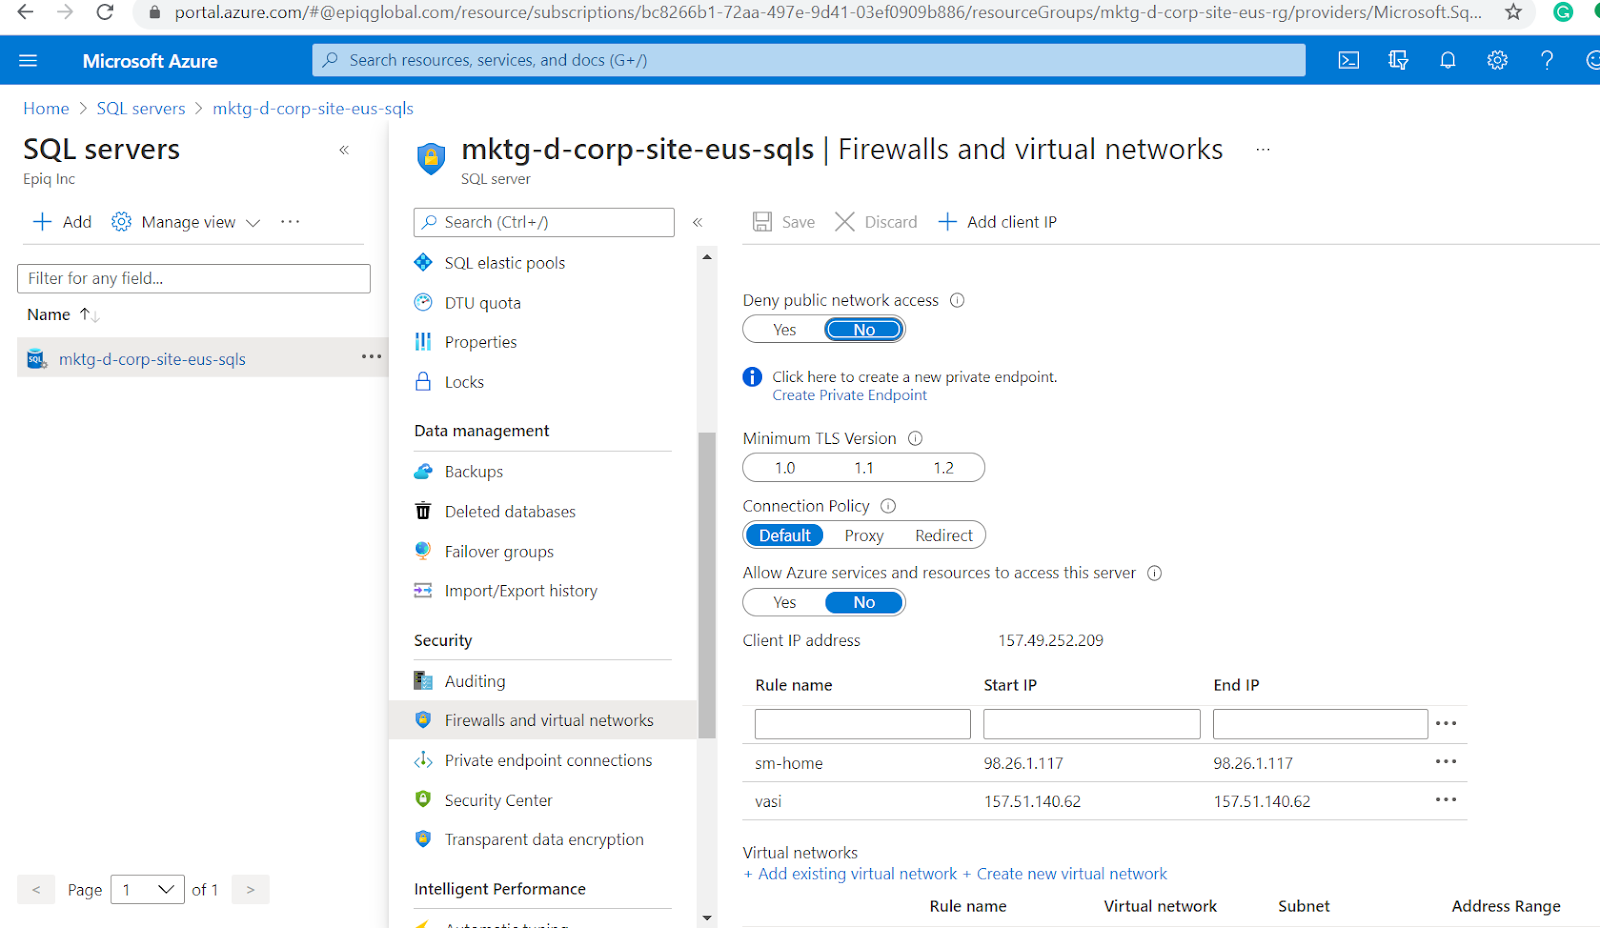
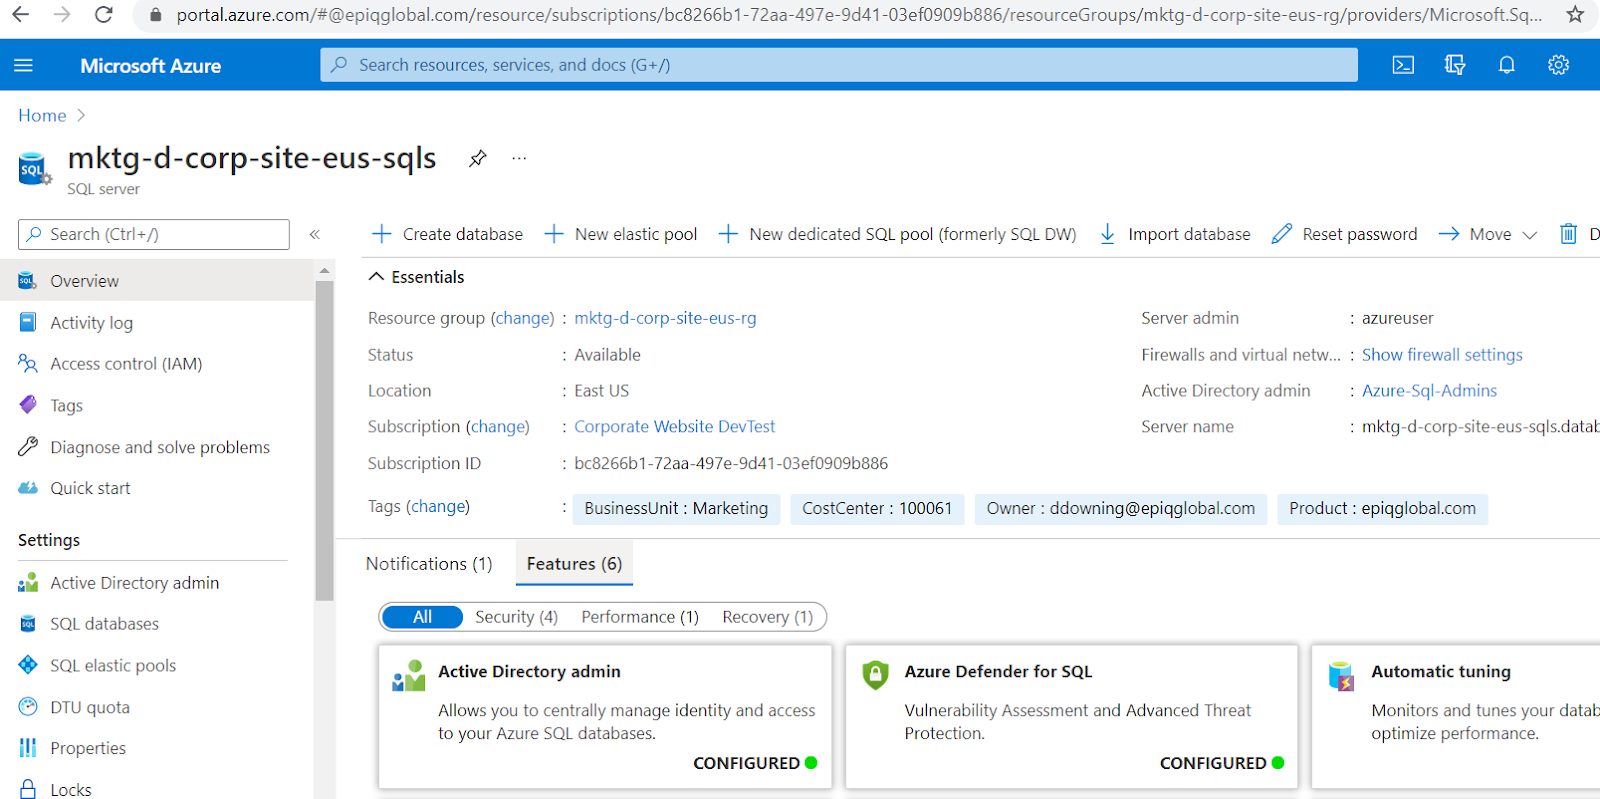
Azure creates a new database under the SQL server. Continue with configuring the SQL server's firewall rules to allow connections to the server from your local environment:
- Open the SQL server in the Azure portal.
- Switch to the Firewalls and virtual networks tab.
- Create a new access rule for the IP ranges of your development and administration machines.
Deploying the Kentico administration to Azure
The last step in the deployment process is to publish the Kentico administration.
Open the Kentico administration project's solution (WebApp.sln) in Visual Studio. Edit the CMSApp project's web.config file and make sure that the sessionState mode is set to InProc.
<sessionState mode="InProc" />
Use InProc mode if you plan to use one instance of each Web App. However, if you need to scale out to more instances, you will need to configure the session state differently. For additional information on storing session state data in an Azure environment, here is a great article.
Publish the CMSApp project in the Visual studio using the Microsoft Azure App Service. In the publishing wizard select your Azure subscription and the Resource group to which you deployed resources using the ARM template. Visual Studio downloads the publishing profile and deploys the Kentico administration project.
Now you can review your deployment in the Azure App service.
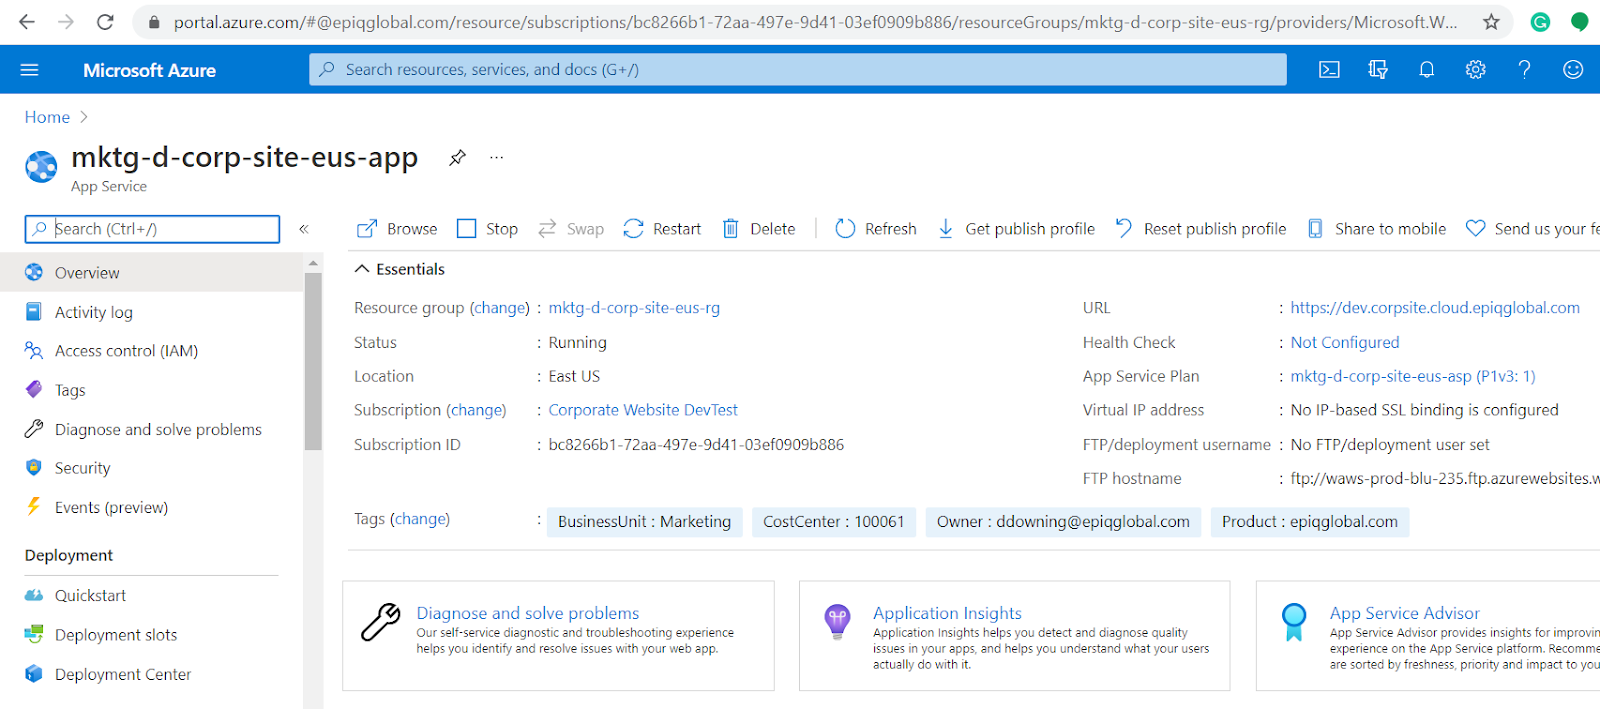
After the deployment has completed, perform the following configurations:
- Check that the project is correctly connected to the database
- Add new licenses for both domains in the Licenses application.
- In the Sites application, set Site domain name to the domain of the Kentico administration Web App and Presentation Url to the full URL of the MVC Web App.
- If your administration project is precompiled, make sure that deployment mode is enabled. For example, this may be necessary if you do not deploy your local database together with the project.
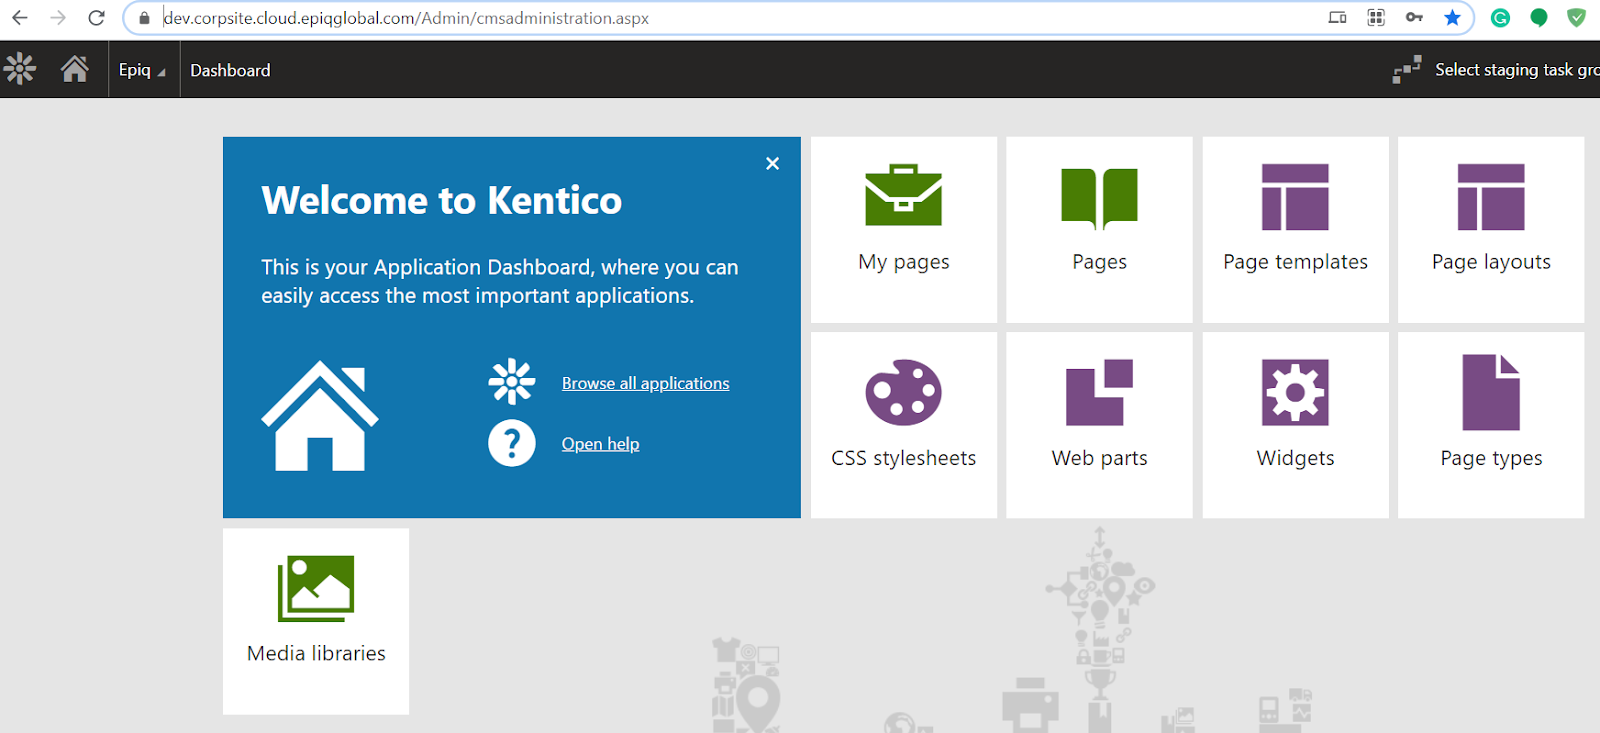
Now you can click the URL in the app service to verify your kentico site .

Login into Kentico xperience to access the kentico administration.
Code Management and Continuous Deployment
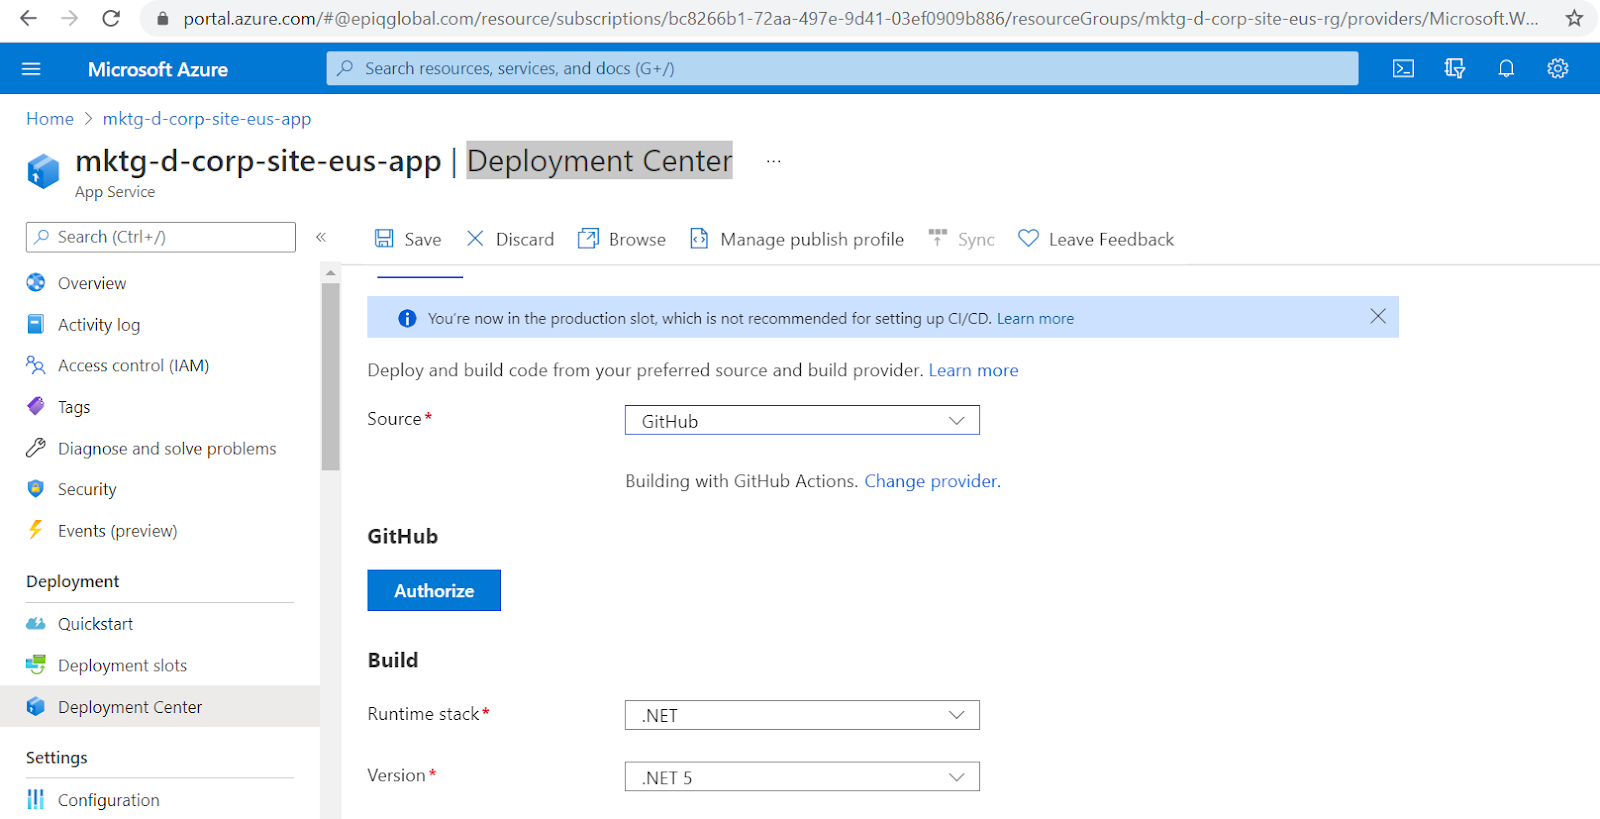
Azure App Service enables continuous deployment from GitHub, BitBucket, and Azure Repos repositories by pulling in the latest updates. We can do these configurations in the deployment center as shown below.
Backups
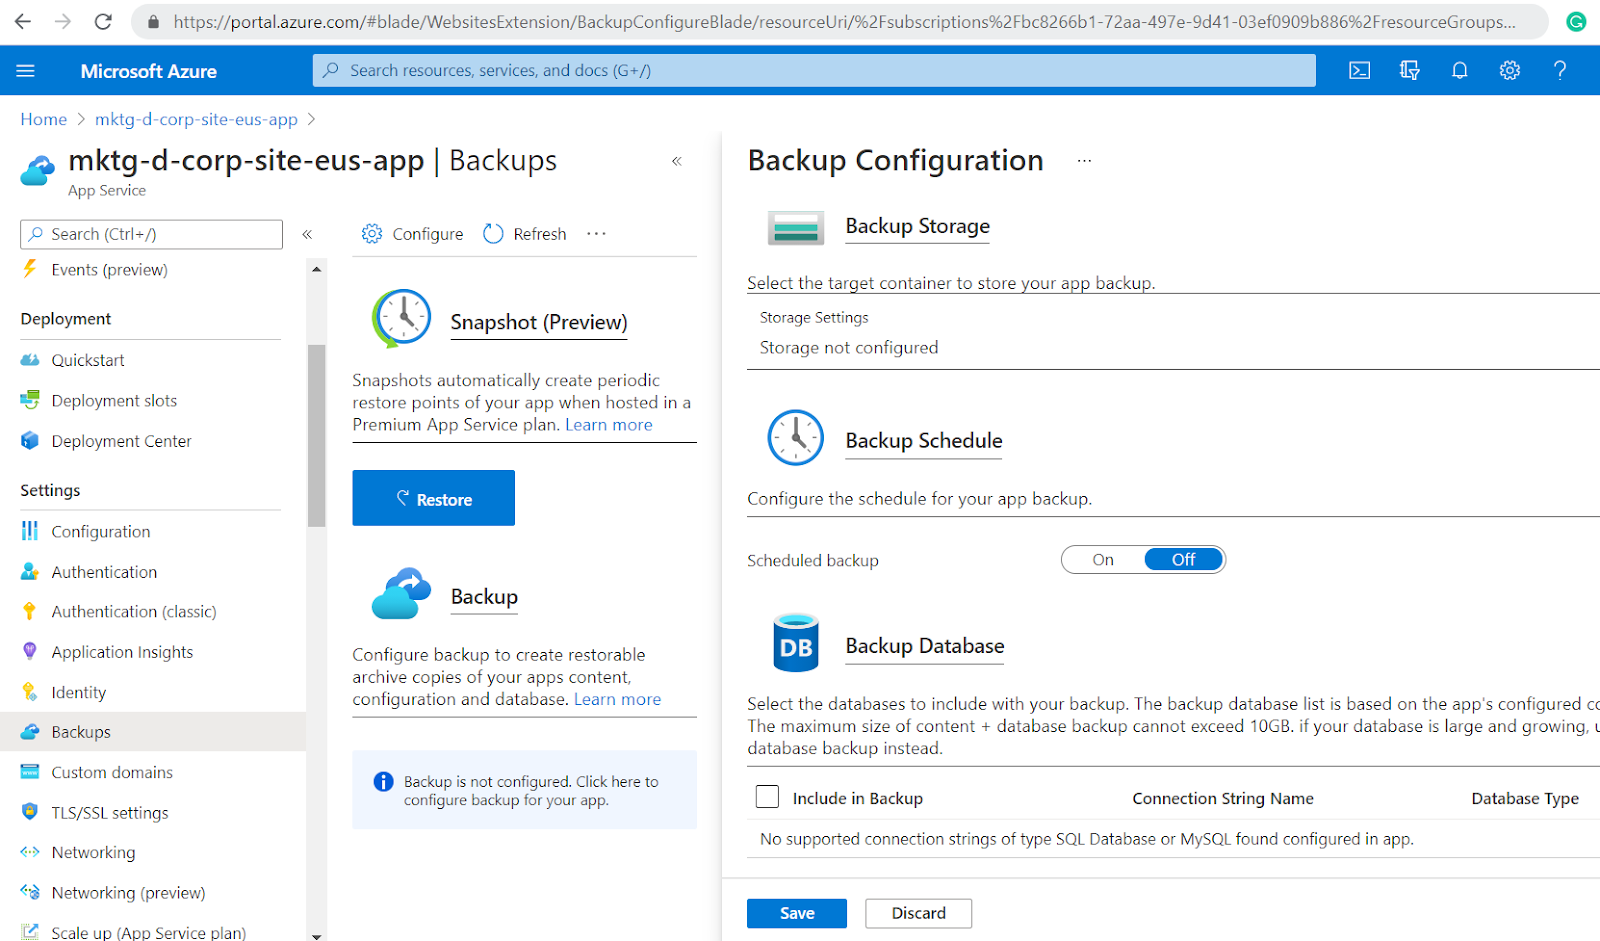
A few key highlights of the The Backup and Restore feature in Azure App Service are:
- It lets you easily create app backups manually or on a schedule.
- You can configure the backups to be retained up to an indefinite amount of time.
- It is easy to restore the app to a snapshot of a previous state by overwriting the existing app or restoring to another app.
- You can backup the following information to an Azure storage account and container that you have configured your app to use.
Conclusion
We have now successfully deployed Kentico on Azure while keeping our code and content intact. Leveraging the power of both product and platform, website developers have the freedom to expand on their designs and scale to a global level without any breakpoints.
To learn more about building custom Kentico web parts or custom page types in Kentico ,check out our CMS insights page.