
Design and operations of complex data feeds in WordPress

Introduction
Design and operations for importing complex data feeds on a a WordPress site can be accomplished by the WP All Import Pro plugin. Imports can be made to carry out regularly by scheduling cron jobs in the WP All Import Pro. Read further to learn about importing complex feeds in detail through an example of one of our clients an insurance company's website.
The Use Case
In this post, we use one of our insurance clients as an example. This particular insurance company has thousands of employees and they are shown on the website, organized by their specialty and office location. There are also deep associations between the employees and any news or thought leadership articles that they might have published.
A sample employee feed is shown below:
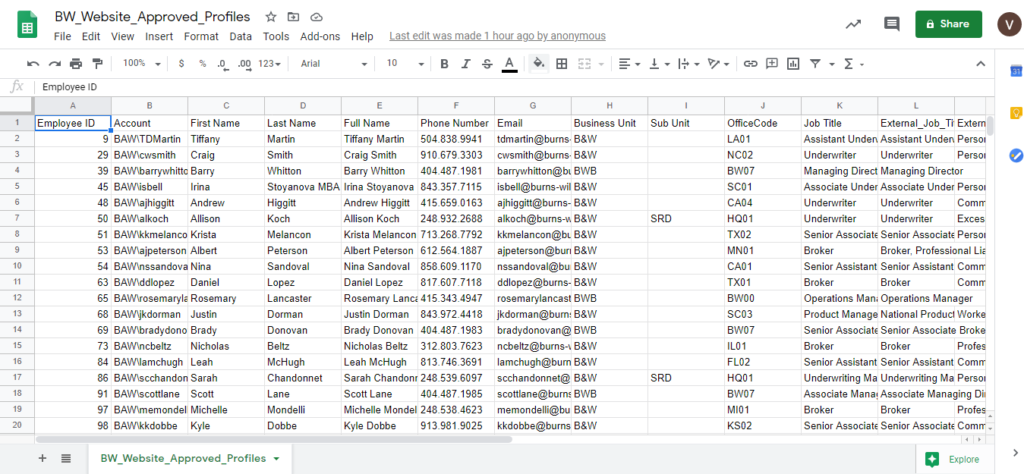
The employees are modeled as a Custom Post in WordPress and you can see a sample record below:

We were asked to import this data feed on a weekly basis. The data import process had to do a few things:
- Automatically pickup the employee file that is dropped into an sftp folder
- Add new employees to the WordPress posts
- Update employee information for existing employees
- Delete employees that have left the company
Designing the Import
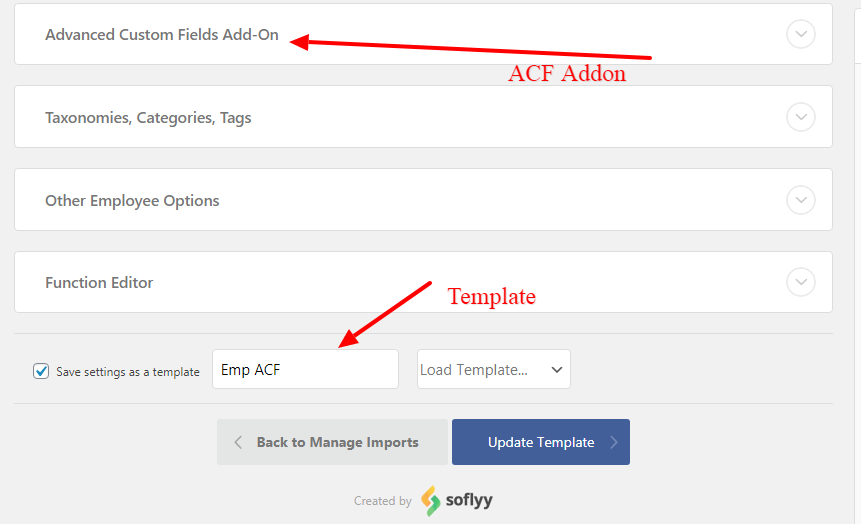
WP All Import Pro lets you create templates for data imports:

For each template, there are lots of settings that you can control. For example, you can decide whether you want to import to posts, custom posts, taxonomies etc.
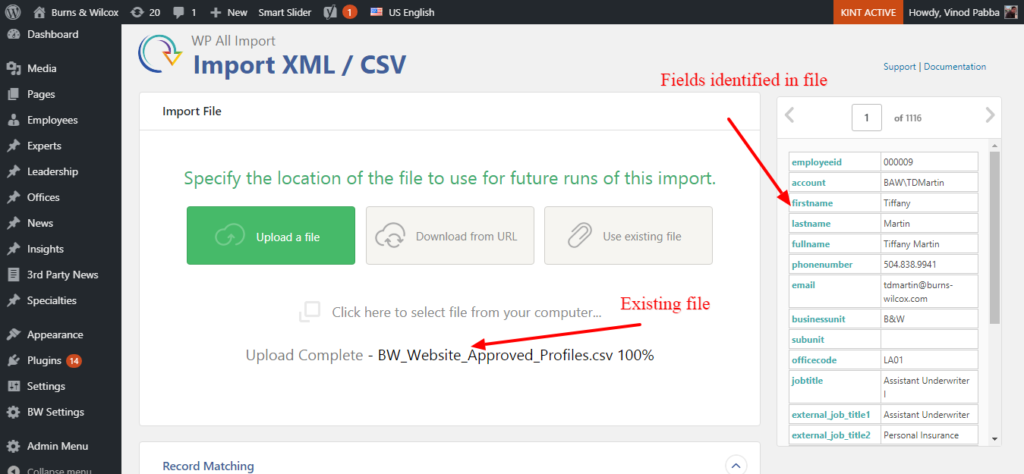
You can do field mapping from the data feed to the post type.
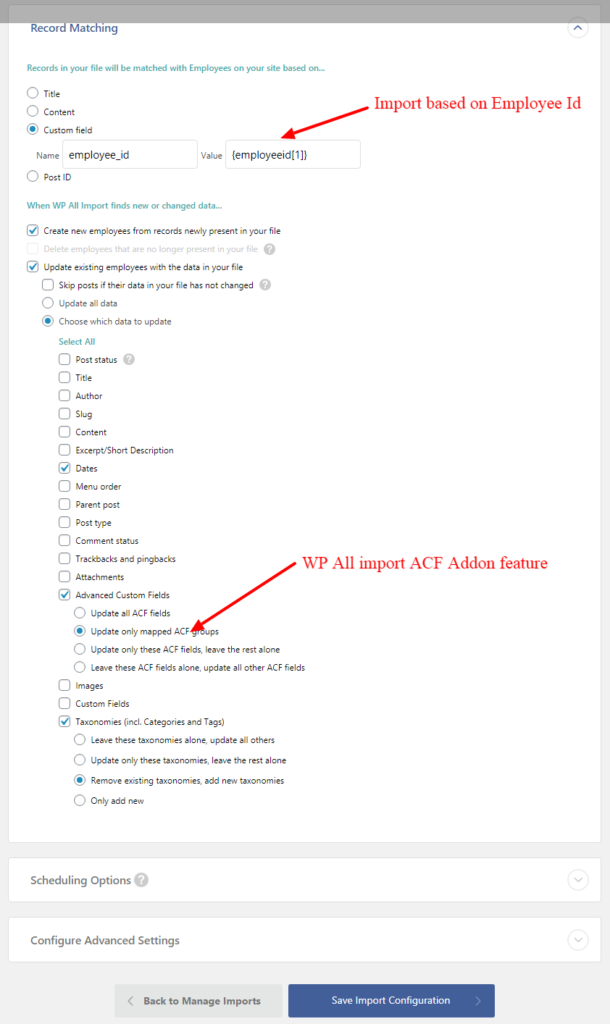
Finally, you can control a lot of things while adding or updating each particular post. For eg., if a record already exists, you can set it up such that you update the record instead of adding a new record. (see below)
Setting up Crons for Regular Scheduling
There are two ways to schedule cron jobs in WP All Import Pro : Automated + Manual. To set up the cron job we first need to identify the SFTP location where the CSV file is regularly uploaded.
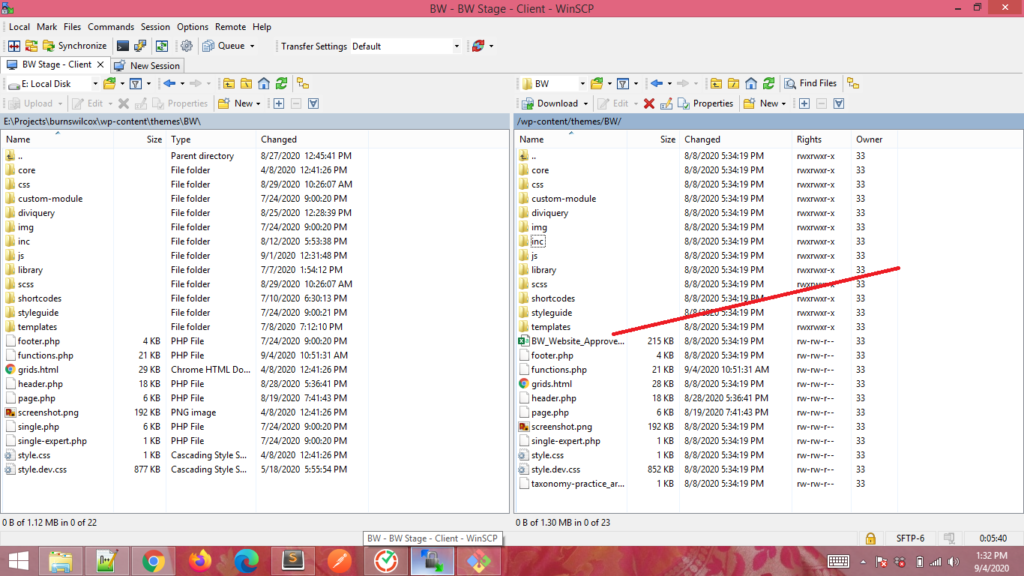
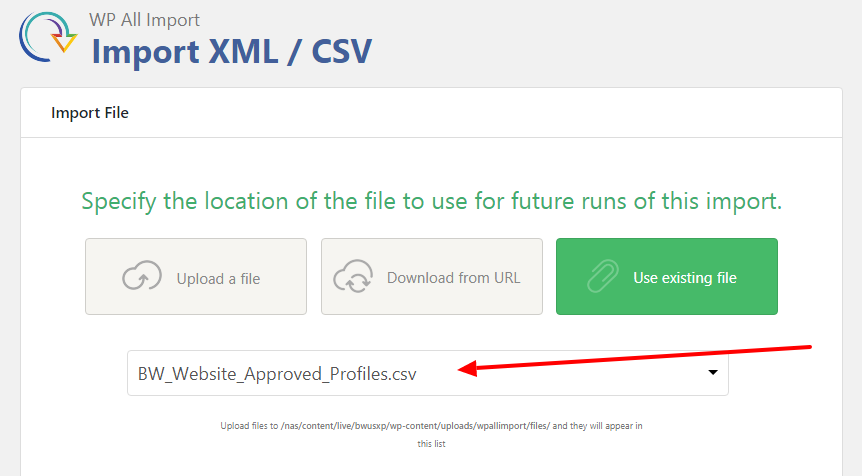
You can then identify where the file will show up regularly (as shown below)
Now we are ready to set up the Cron job. There are two steps to follow here.
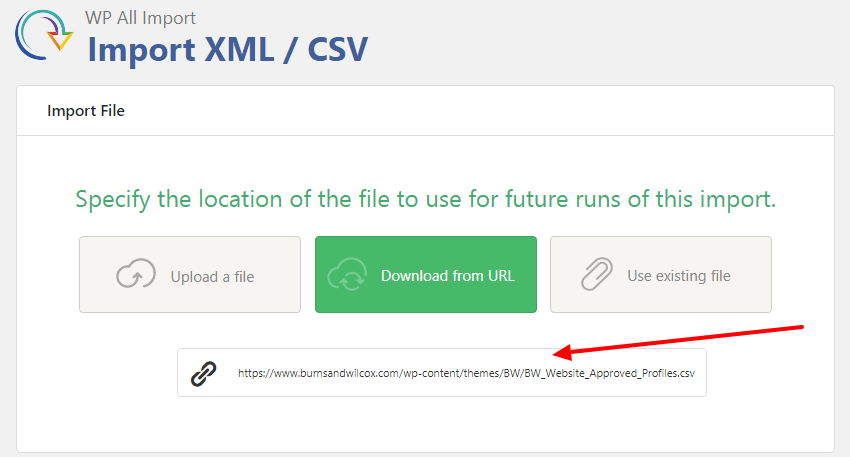
First, we need to get the Cron URL from WP All import To get this URLl, we need to change the file location in import settings as shown below.
Now, you can set up the cron job to operate on a schedule: Weekly/Monthly and configure a lot of parameters such as the day of the week etc.
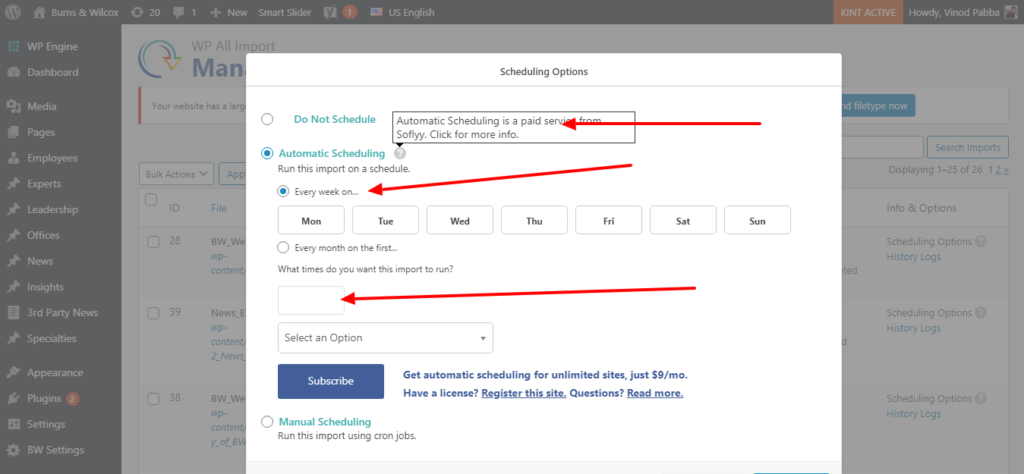
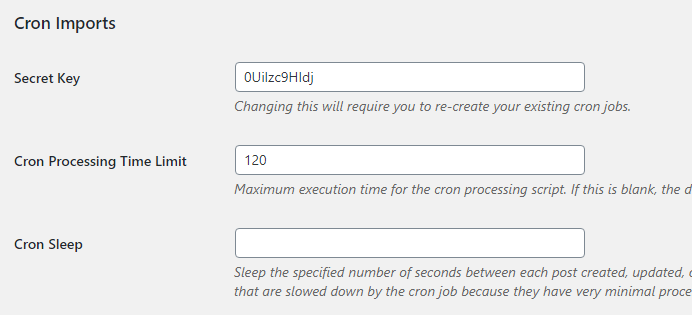
An important note: Remember to set up a secret key for the cron jobs along with other parameters such as time limit and sleep settings.
Cron to delete old Employees & Experts
Deleting employees that have left the company is actually a tricky business. There is no indicator in the incoming data feed that such-such employee has left the company. So, we implemented the following design:
- When doing an import, we put a date-time stamp of “today” on the WordPress post
- Then we look at for all posts whose date-time stamp is NOT “today”
- Then we run a cron job that programmatically deletes all these posts whose date-time stamp is not “today”
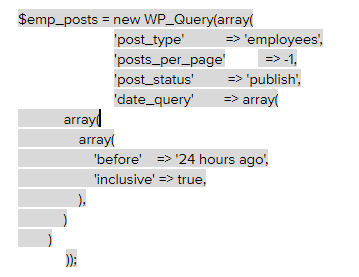
The query shown below identifies the old employees based on date NOT EQUAL “today”
The statement below deletes employees based on the results from above.
wp_delete_post( get_the_ID(), true);
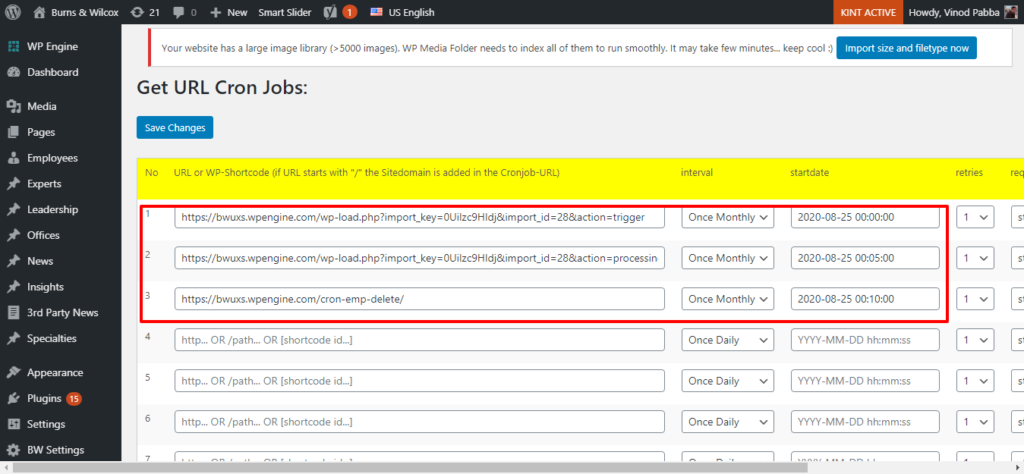
The final step is to SCHEDULE all these operations into a cron job, so that after every import of the employee data feed, these operations run and delete old employees. To do this, we created a php page that contained all the delete operations mentioned above. We then added this page url to run the cron.
As you can see in the screenshot below, we schedule this cron job to run 5 minutes after the employee data feed import is completed. This ensures that the delete operations run after the new employees are imported.
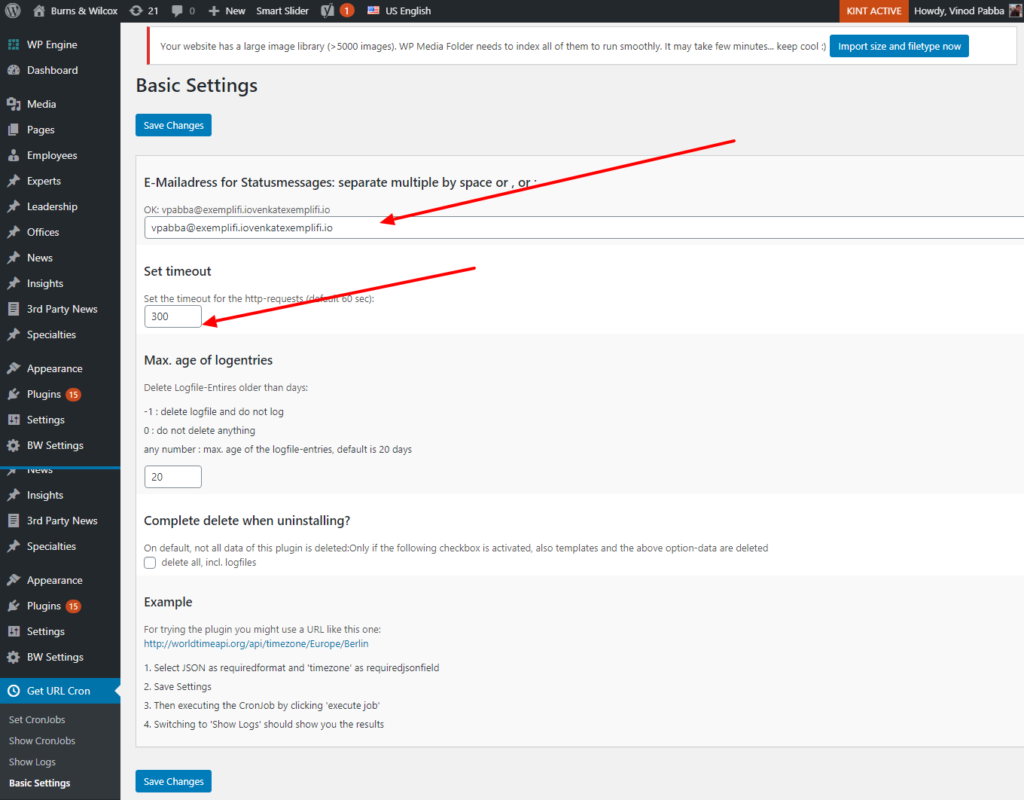
Finally, to get email notifications about these jobs, you can set up email IDs and timeout parameters.
Summary
In this post, we discussed how to design for importing complex data feeds in WordPress. We also show how to design for weekly scheduled imports. We implemented these workflows using the WP All Import Pro plugin. There are web design companies that struggle with this, but at Exemplifi, we've mastered the art. We can take these data feeds to the next level by adding site personalization in WordPress. Additionally our partners at Design Rush have great resources and articles about how to choose a web design agency.
If you liked this insight and want more updates, we’d love for you to join us on Linkedin at Exemplifi, Facebook at ExemplifiSites or Twitter at ExemplifiSites.