A Webflow Widget to Display, Filter and Style Data from Multiple Collections
Introduction
Webflow is one of the most popular website builders that helps companies create a stunning digital presence with ease and minimal technical efforts. They are spearheading the no-code movement and as a Webflow partner, we work closely with Webflow to help enhance and grow the experience for users that use the platform. One of our clients wanted a webflow widget to help solve the problem of filtering and displaying displaying data from multiple collections. The solution involves styling with Vue components and wrapping the functionality into a reusable Webflow Symbol. Here’s how we did it.
The Client Problem
The client needed a section that looked like below:

This section had the following functionality:
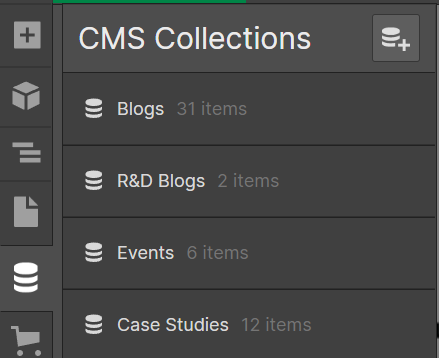
- It pulls data from four different collections: Blogs, R&D, Case Studies and Events
- We then filter by a flag called “Featured” on each of these collections
- Finally, we sort the data – latest first – and display the Featured content across all these four collections.
To support this, we modeled all the collections in Webflow:
At this stage, we ran into several limitations within the Webflow platform that prevented us from building the section as described above. In the next section, we elaborate on these limitations.
Webflow Limitations
The core challenge with Webflow is that a “Collections List” widget can connect to only a single collection.

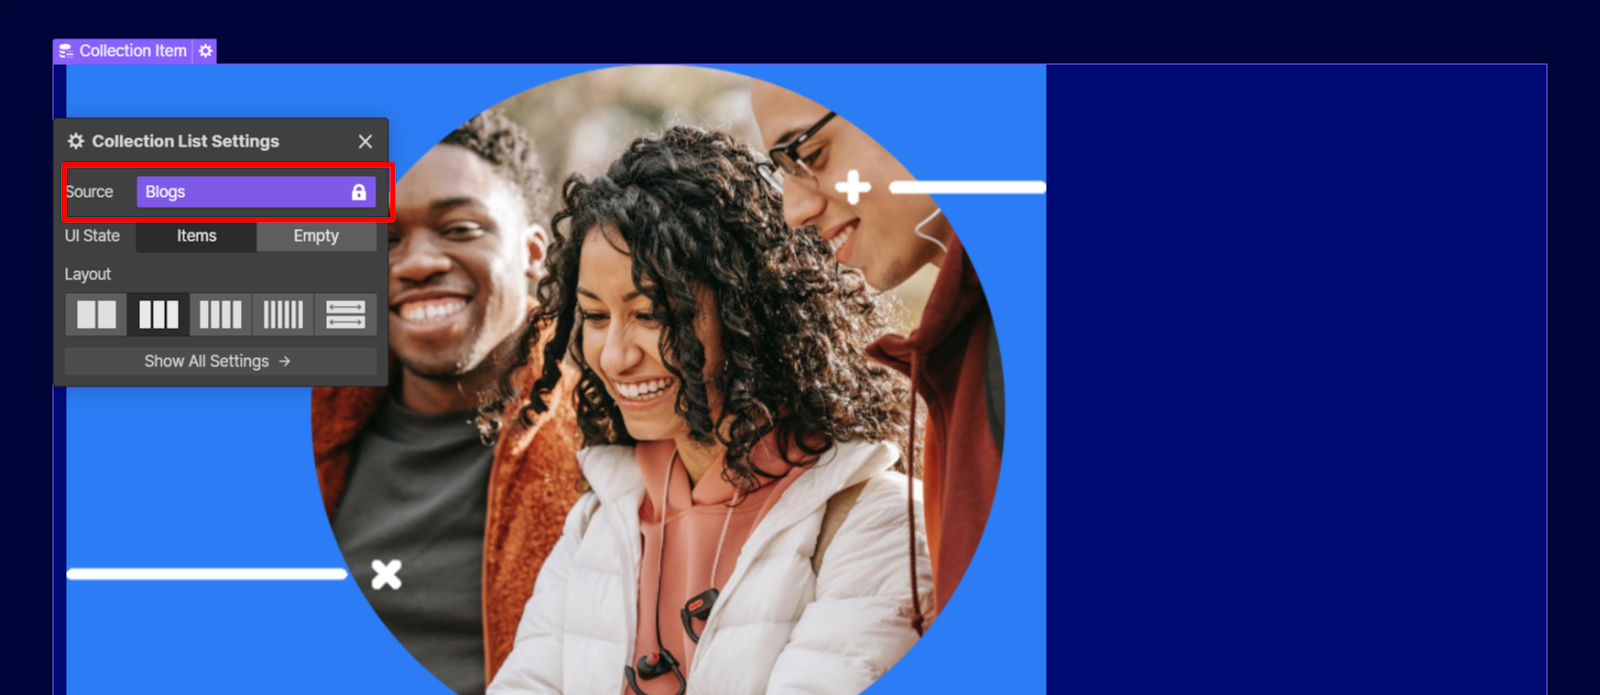
What this means is that at the outset, it is not possible to create a Collection List that gathers data from all the four collections: Blogs, R&D, Case Studies and Events.
For a single collection, we can apply filter such as “Featured Flag is On”
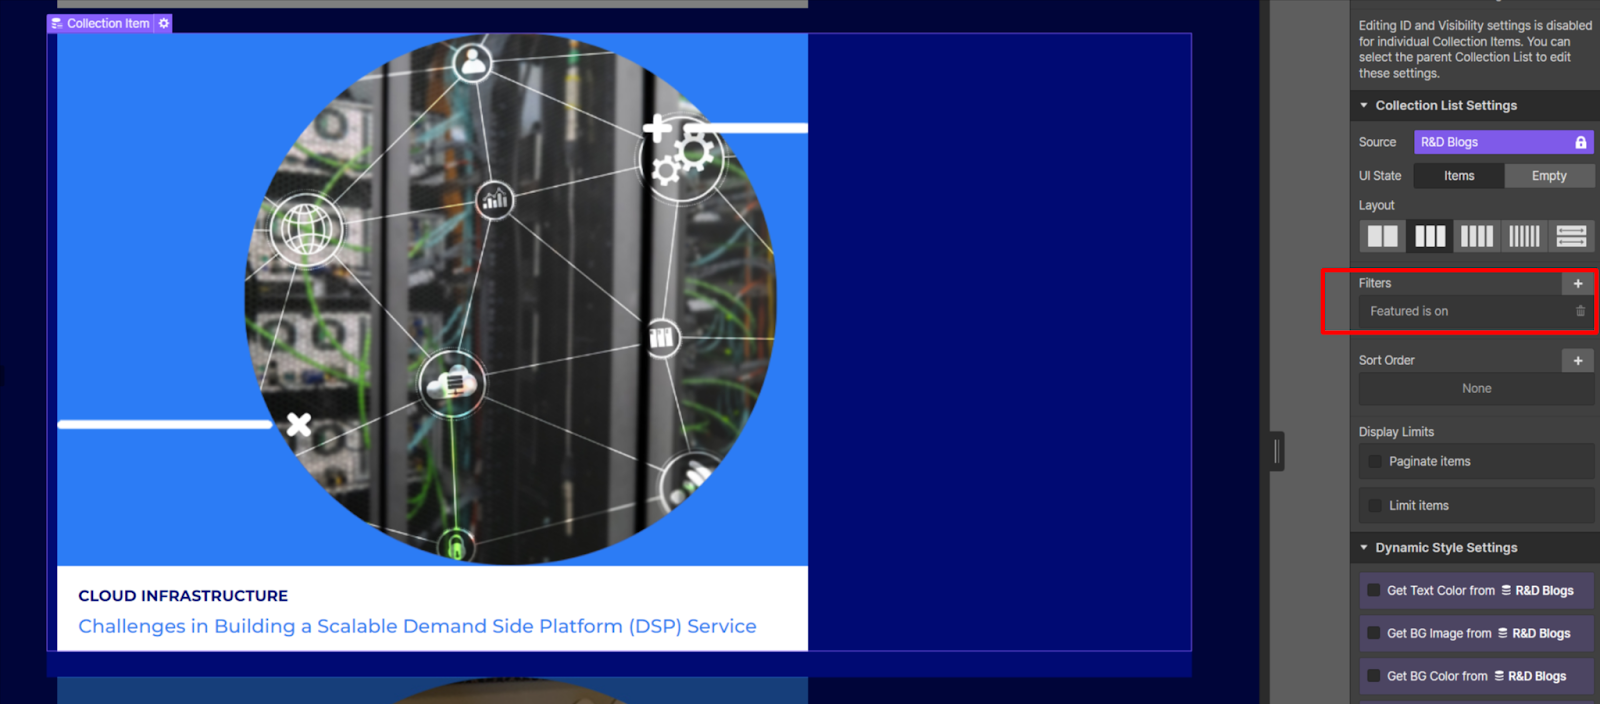
However, we are still limited because we cannot get data from all collections and then filter them in a single go.
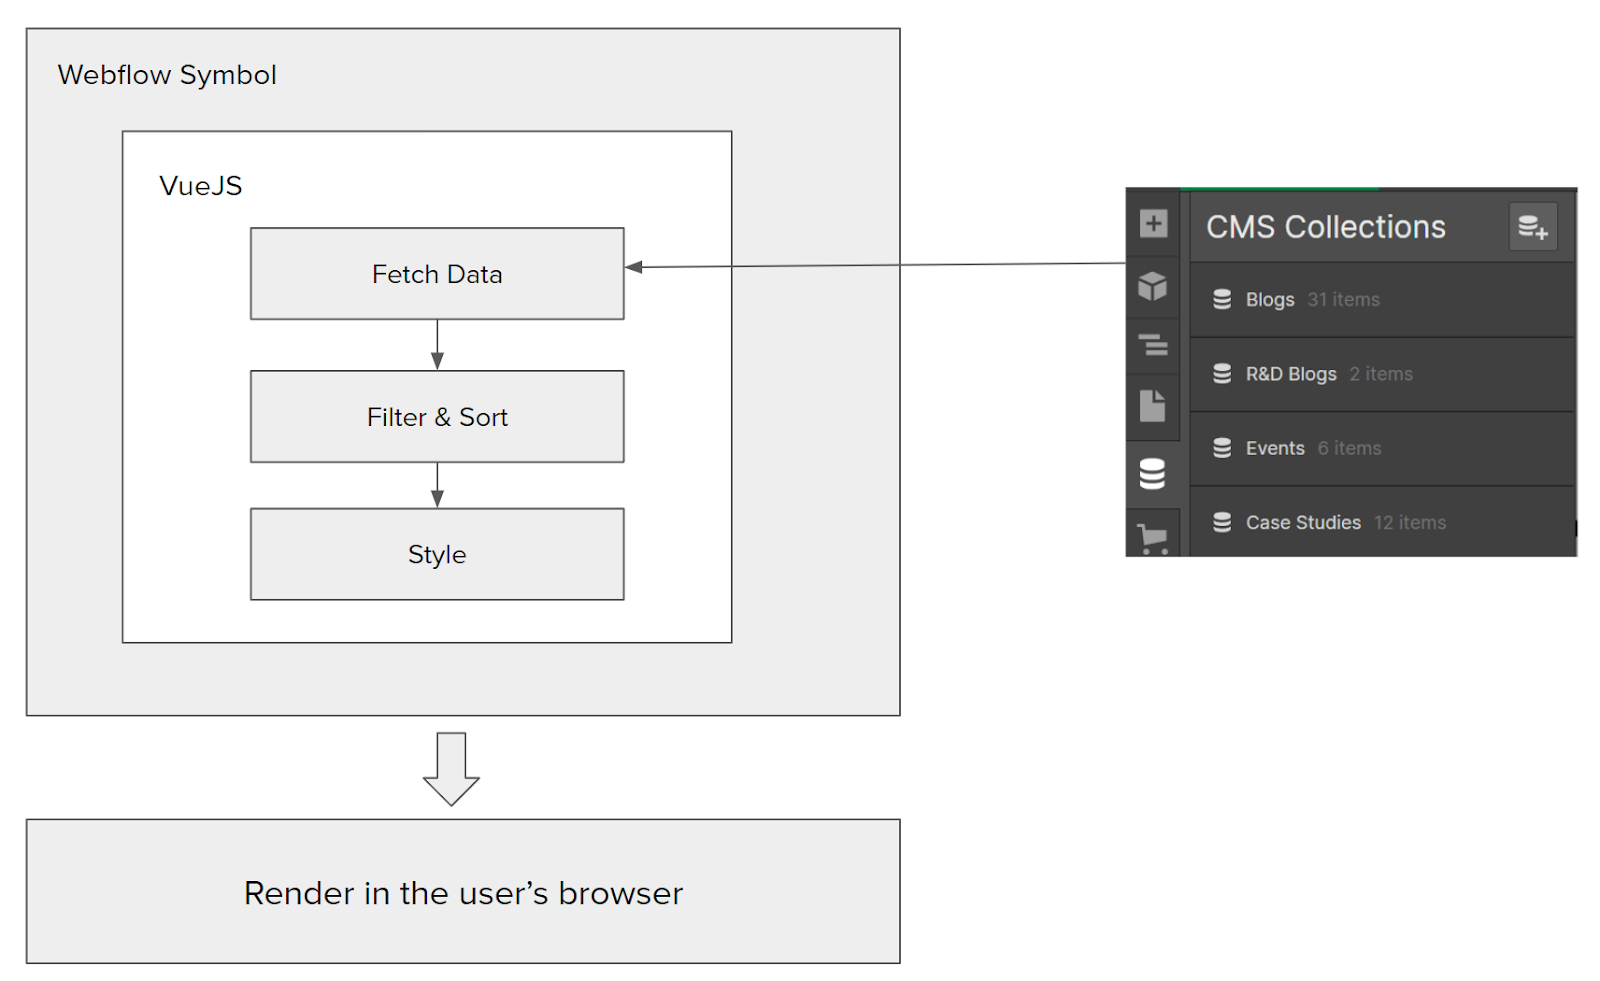
Our Solution Overview
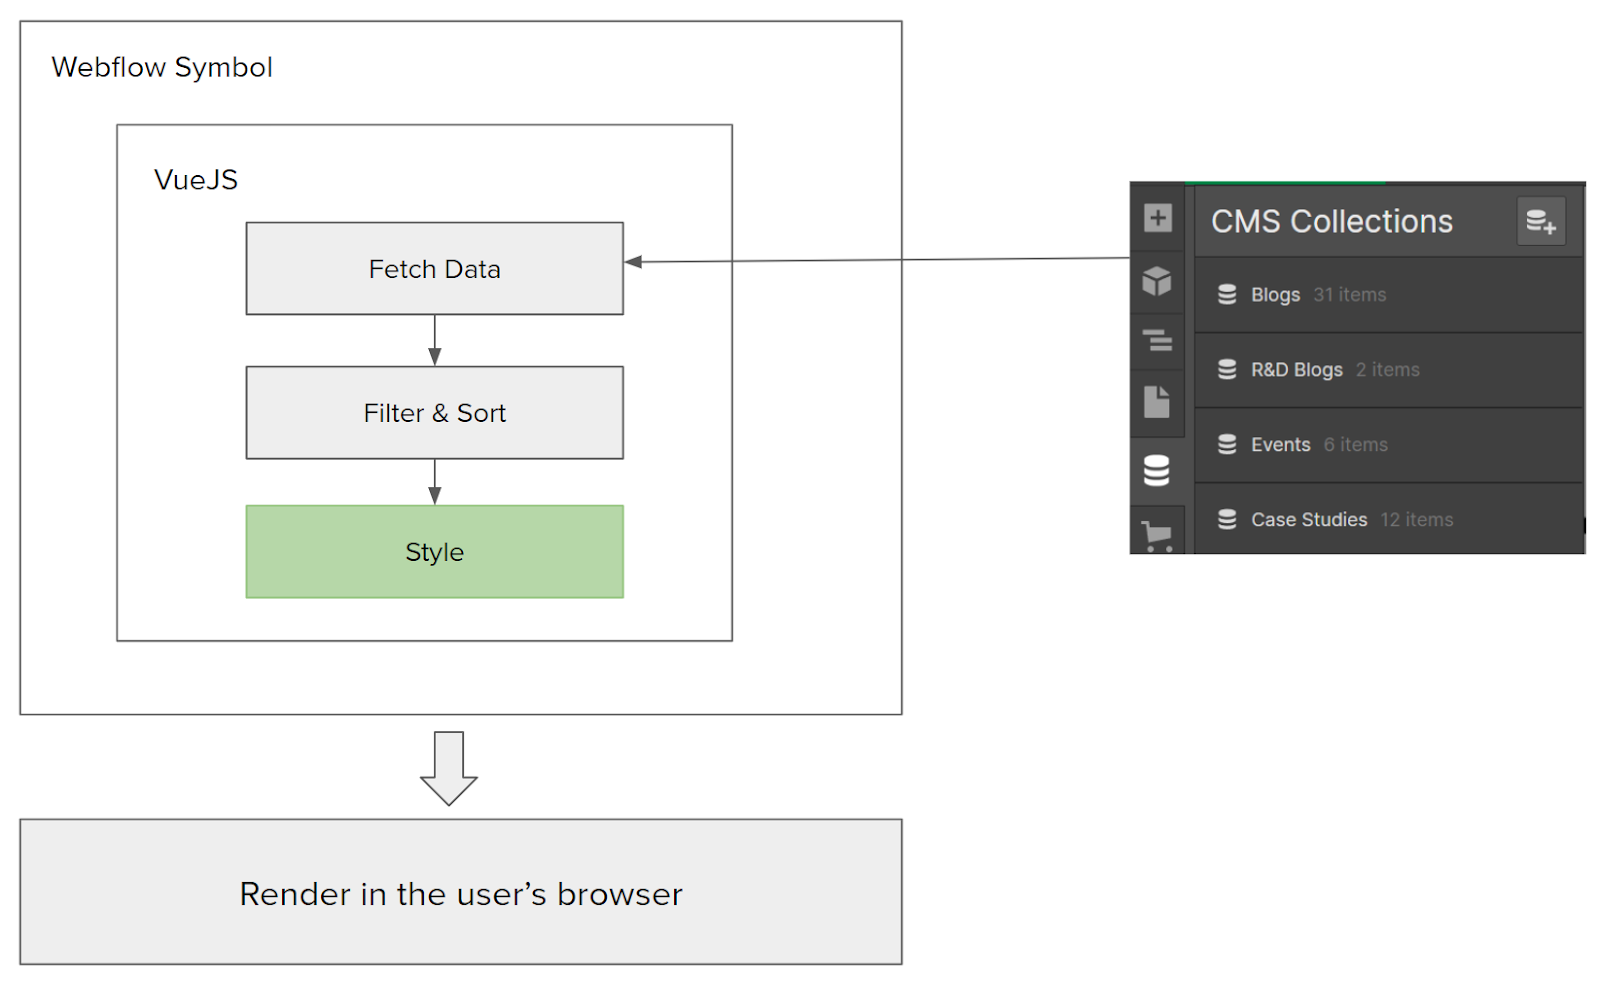
To achieve our client objectives and circumvent the Webflow limitations, we designed a solution that did the following:
- Made API calls to and got the data from all the four collections
- Leveraged a VueJS based front-end solution to filter and sort this data
- Applied the desired styling within Vue
- Wrapped all of this functionality and incorporated into a Webflow Symbol that could be reused by the client.
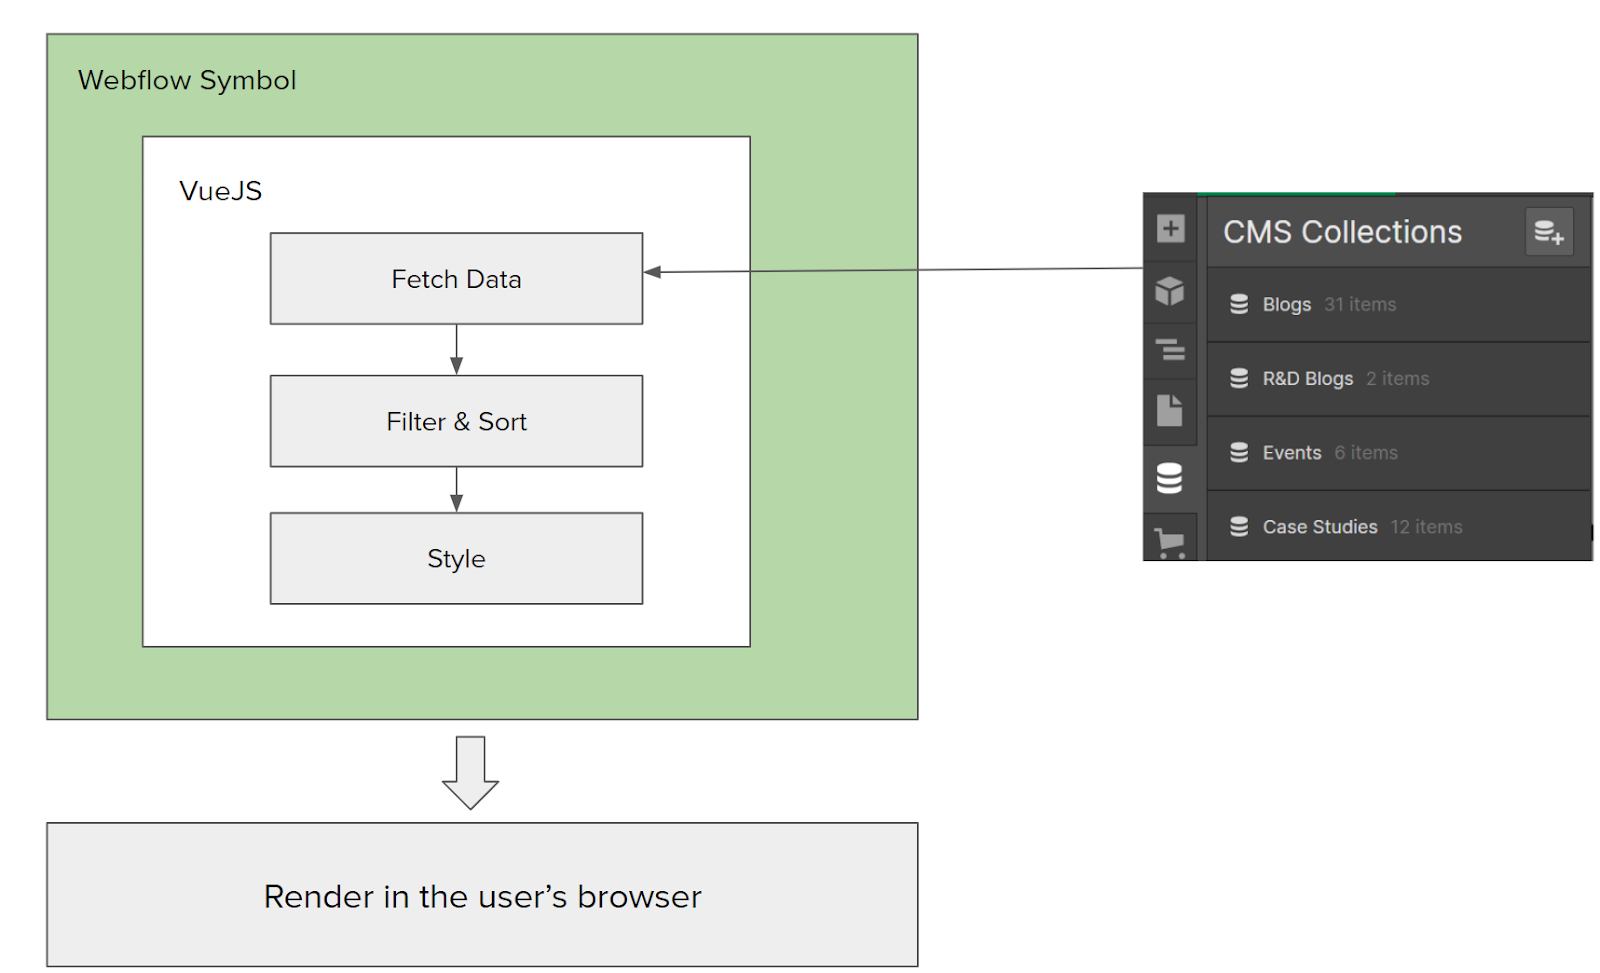
The high-level architecture is shown below:
Solution Details : Getting data from the Webflow Collections API
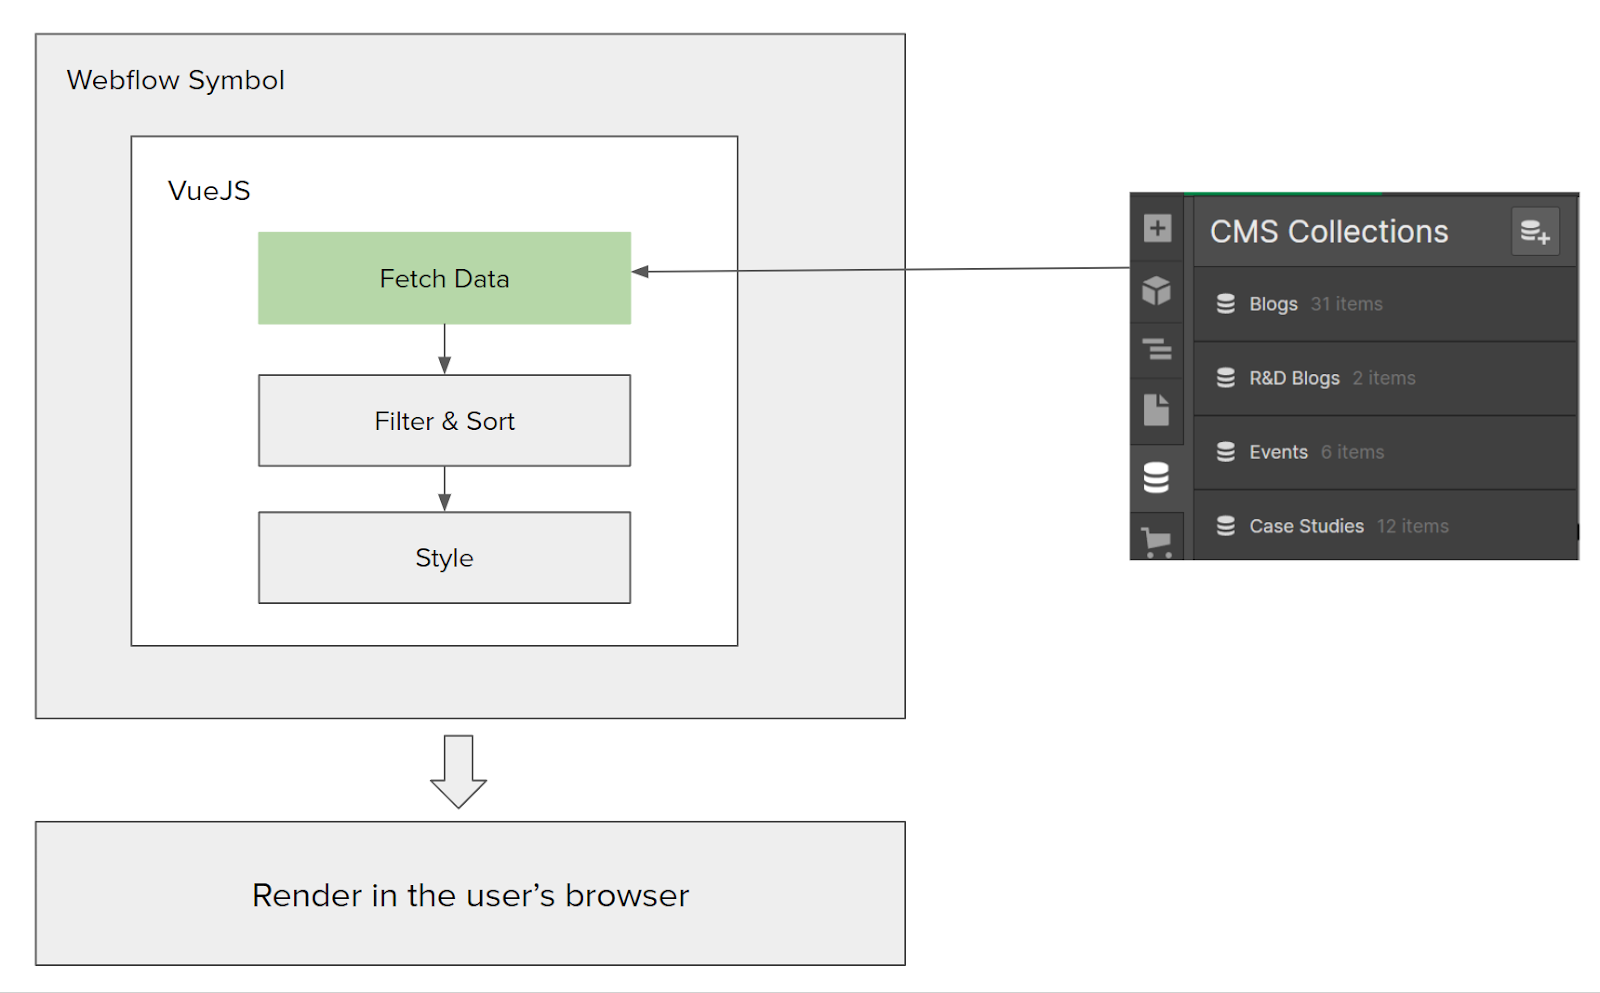
Vue App
The first step is to initialize a basic VueJS app. Then we instantiate the needed methods to fetch data as well as format it.
var app = new Vue({
	el: '#app',
	data: {
		message: 'Multi Collection',
		items: []
	},
      methods: {
      },
      created: function() {
      }
})
Connect with Webflow API
We do not recommend calling the Webflow CMS APIs directly from Vue, as it is a frontend framework and this can result in security issues if we call the APIs directly. To circumvent this, we used Autocode – although you can do this in many different ways – which is an automated API management tool. (screenshot below)
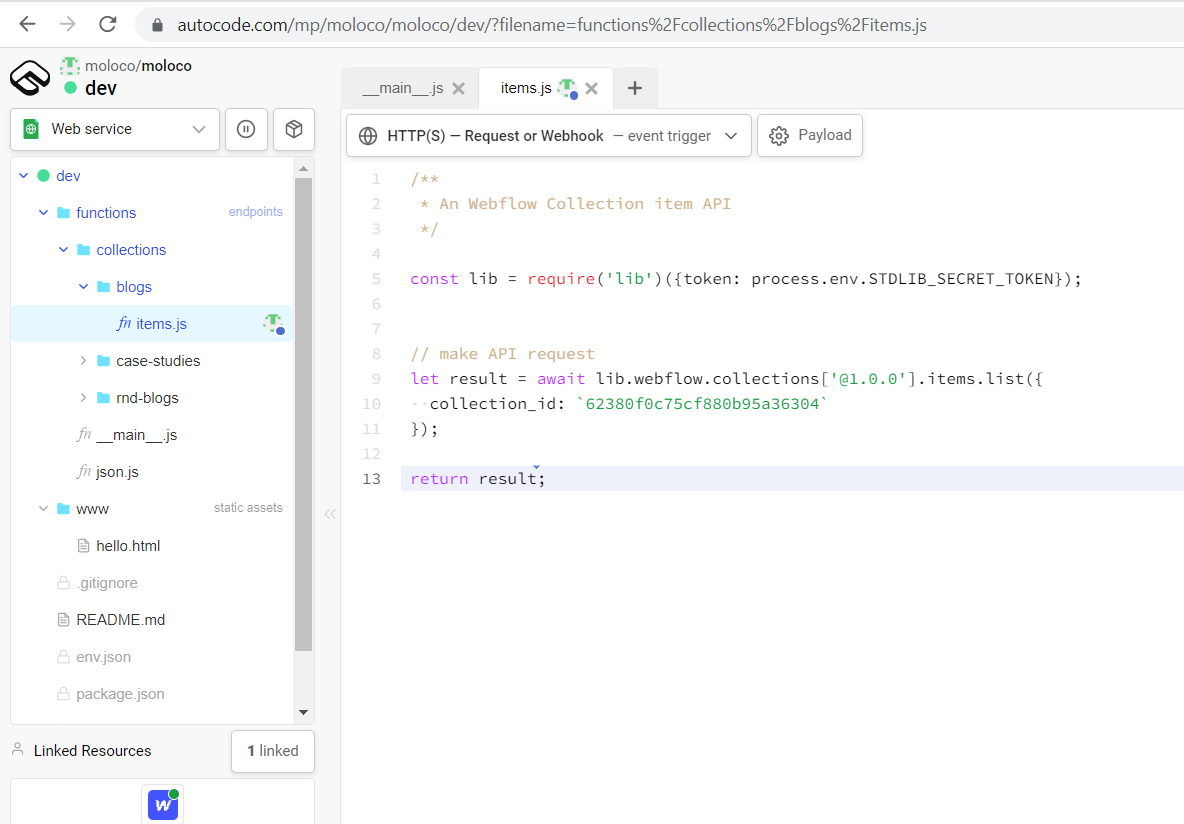
In Autocode we connected to the Webflow account and created a web service project that had several REST API endpoints for the four collections that we needed: Blogs, R&D, Case studies and Events.
https://dev--moloco.moloco.autocode.gg/collections/case-studies/items https://dev--moloco.moloco.autocode.gg/collections/blogs/items https://dev--moloco.moloco.autocode.gg/collections/rnd-blogs/items
https://dev--moloco.moloco.autocode.gg/collections/events/items
When this executes, the resulting JSON response from Autocode will look like this
{
  "items": [
    {
      "_archived": false,
      "date-and-time": "2021-08-27T00:00:00.000Z",
      "_draft": false,
      "minutes": 5,
      "name": "How Moloco Tackles Geo-Bleed for Clean Traffic",
      "blog-content": "Blog Content",
      "slug": "challenges-in-building-a-scalable-demand-side-platform-dsp-service",
      "author-2": "62381b6b2e6e68341ff4e85b",
      "updated-on": "2022-04-08T16:31:05.570Z",
      "updated-by": "Person_5d5be36140c6be829583f93b",
      "created-on": "2022-03-31T19:03:43.814Z",
      "created-by": "Person_5d5be36140c6be829583f93b",
      "published-on": "2022-04-08T16:31:32.425Z",
      "published-by": "Person_5d5be36140c6be829583f93b",
      "tags": "6243de4de832b14b2974cde2",
      "featured": true,
      "_cid": "62381aa25031d414e4f8f46f",
      "_id": "6245fb0fc69ee9460661d7fa"
    }
  ],
  "count": 2,
  "limit": 100,
  "offset": 0,
  "total": 2
}
On the Vue side, we now consume this content using an Axios call. One optimization that we did here was to consume all these APIs concurrently using the Promise library – this resulted in substantial performance improvements than consuming sequentially. Instead of making multiple HTTP requests individually, the axios.all( ) method lets us make multiple HTTP requests simultaneously.
created: function() {
	let endpoints = [
  'https://exemplifi.dev.webflow/collections/case-studies/items/',
	'https://exemplifi.dev.webflow/collections/blogs/items/',
  'https://exemplifi.dev.webflow/collections/rnd-blogs/items/',
	];
	Promise.all(endpoints.map((endpoint) => axios.get(endpoint))).then(
	  axios.spread((case_studies, blogs, rnd_blogs) => {
			this.getCaseStudies(case_studies.data);
			this.getBlogs(blogs.data);
			this.getRNDBlogs(rnd_blogs.data);
	  })
	);
}
At this stage, we have accessed all the data from the four Webflow collections.
Solution Details: Filtering Logic in Vue
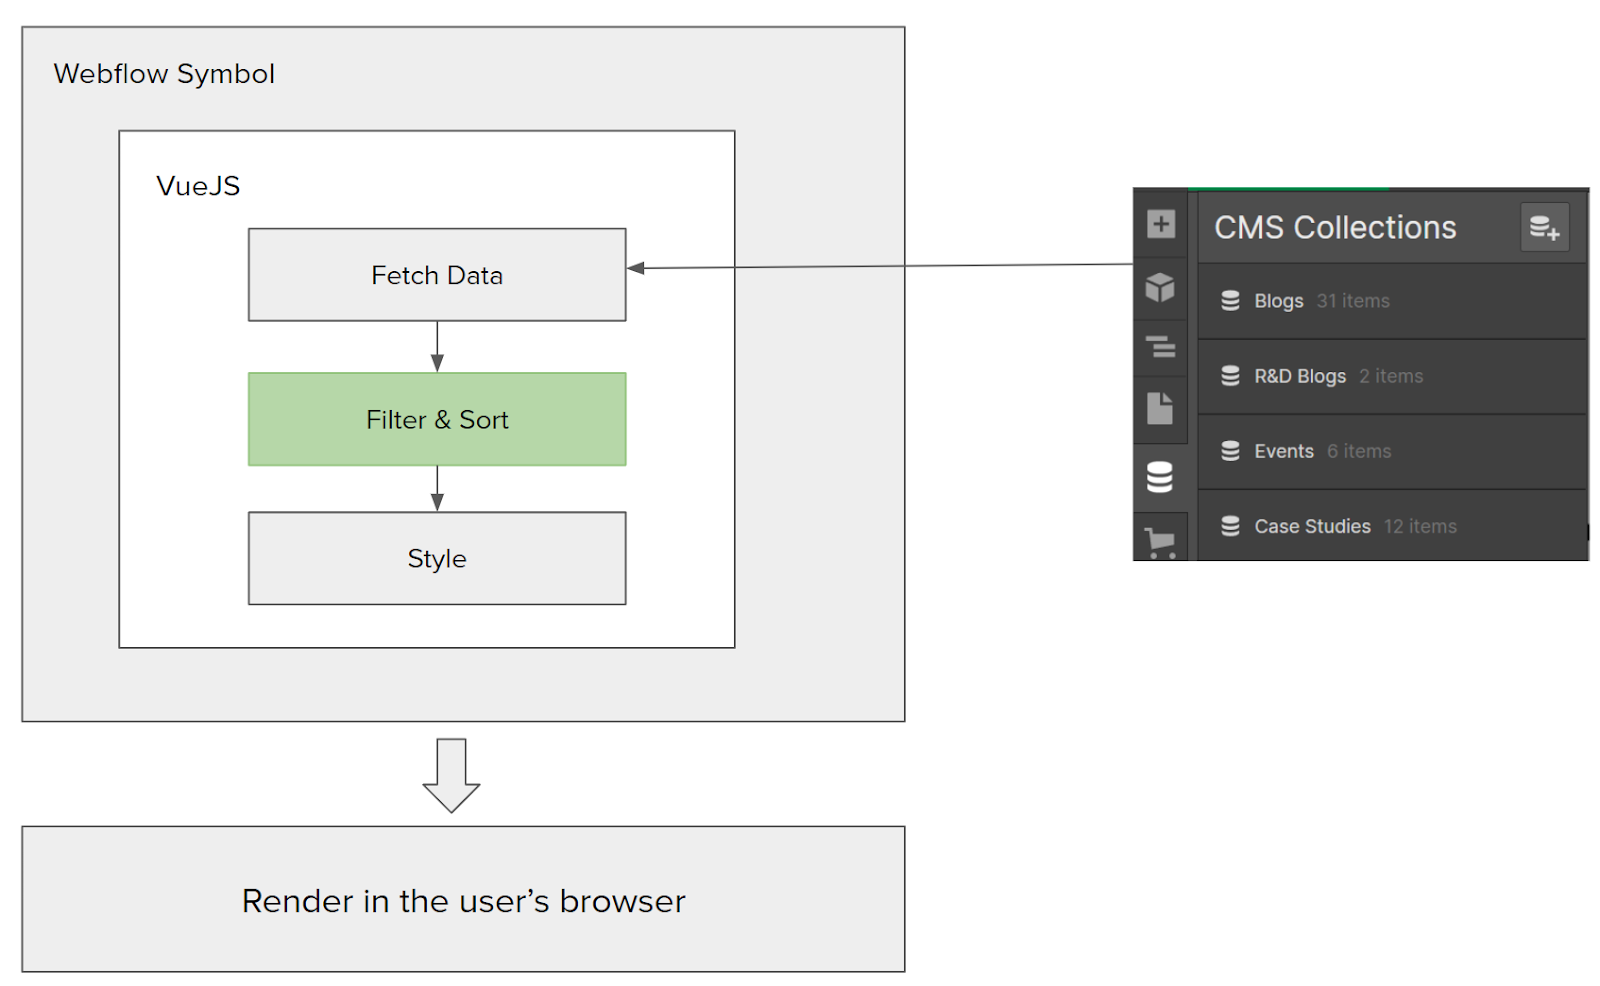
VueJS Filtering
The next step is to filter data from all the four collections by the flag “Featured = True”. The method below iterates over the collection items, checks for Featured items and returns the filtered data.
filteredItems: function(data) {
	data.items = data.items.filter((item) => {
	  return (item.featured == true)
	})
	return data;
}
VueJS Sorting
The filtered items are then merged in a single global array and sorted by date. The following function will achieve this:
sortItems: function(data) {
	data = data.sort((a, b) => b.date - a.date)
	return data;
}
At this point, we have filtered + sorted the data just as we need it. The final Vue object looks like below:
[
    {
        "name": "Organic Poaching",
        "image": "organicPoaching_bannerImage_0622.jpg",
        "author": "62381b6b2e6e68341ff4e85b",
        "id": "6246ee583d33fa25df189b40",
        "cid": "62381c01b6d9c8189c889bcf",
        "slug": "/case-studies/organic-poaching",
        "date":"2022-03-03T14:00:00.000Z"
    },
    {
        "name": "Challenges in Building a Scalable Demand Side Platform (DSP) Service",
        "image": "Challenges%2520in%2520building%2520a%2520DSP.png",
        "author": "62381b6b2e6e68341ff4e85b",
        "id": "6245fb0fc69ee9460661d7fa",
        "cid": "62381aa25031d414e4f8f46f",
        "slug": "/r-d-blog/challenges-in-building-a-scalable-demand-side-platform-dsp-service",
        "date":"2022-03-05T14:00:00.000Z"
    }
]
Solution Details: Widget Styling in Vue
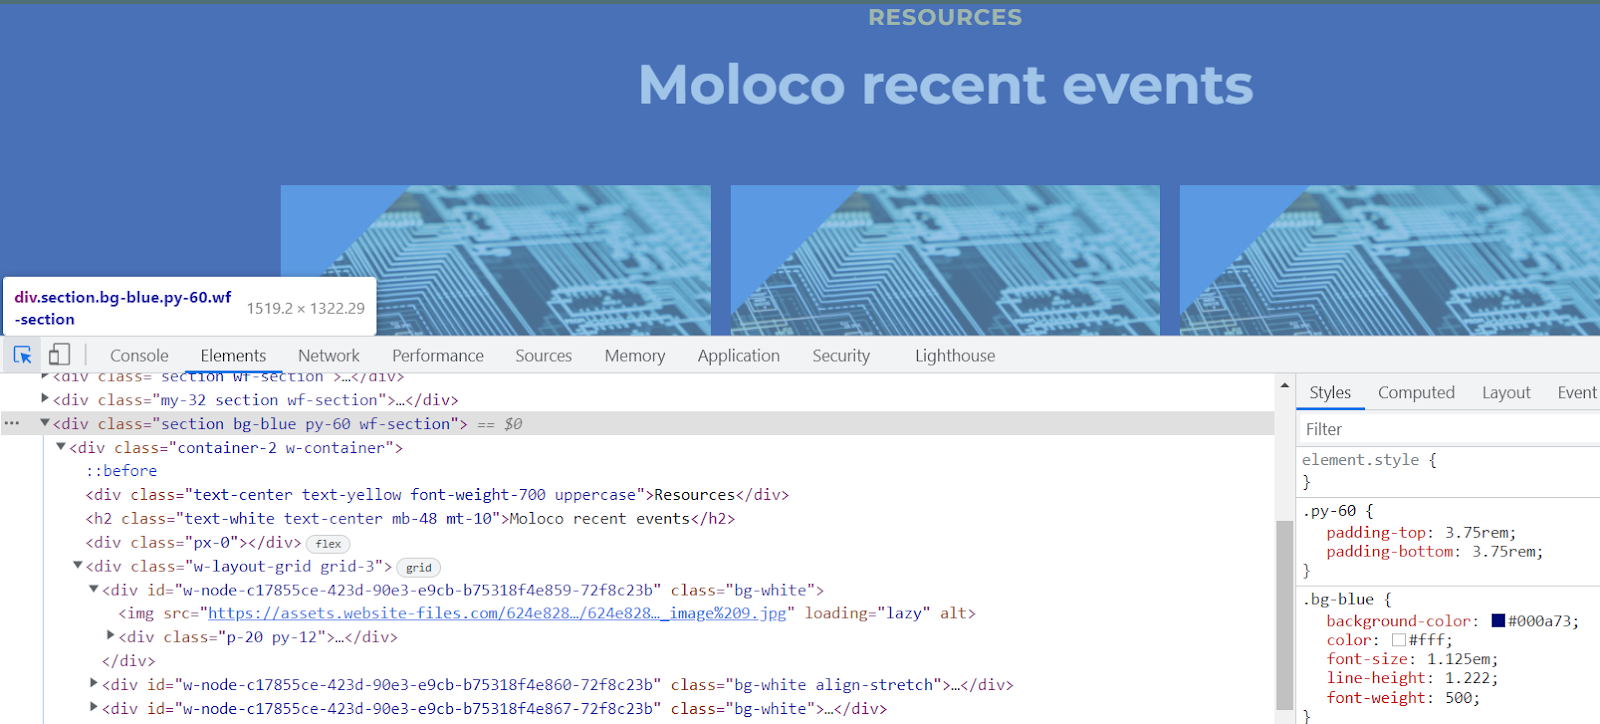
Now that we have the data, the next step is to style it to look like below:

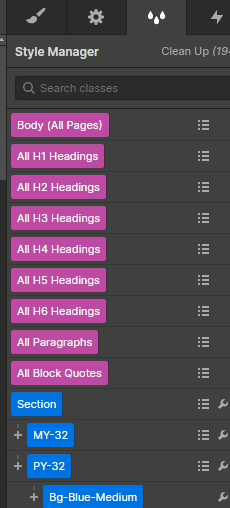
To achieve this, the first step is to build a static widget in Webflow, using the styles that have already been built for the rest of the website project.
Now inspect the resulting HTML structure and classes in the browser.
Use this exact HTML structure + styles and integrate them in the Vue component template as shown below.
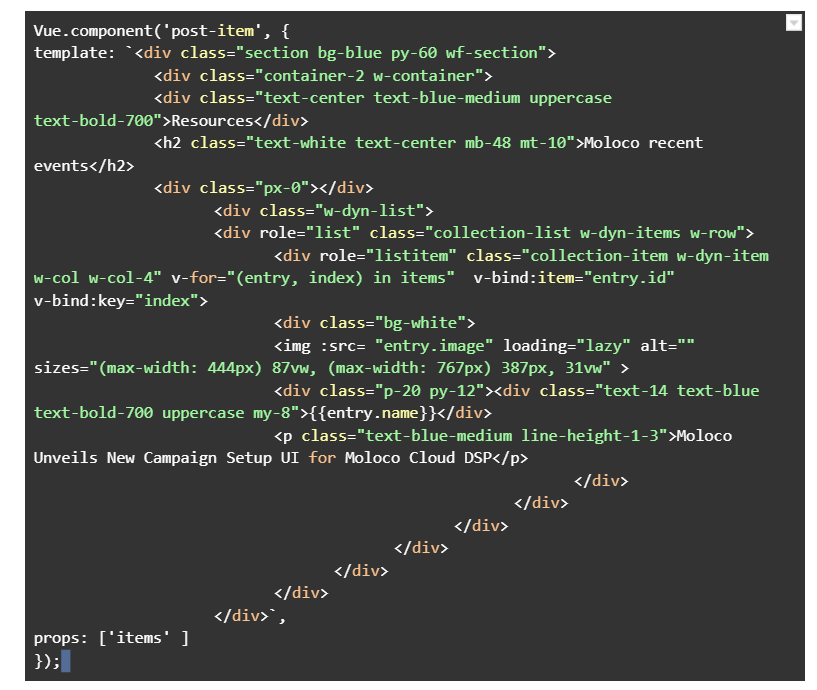
The collection item array is then iterated over the div structure to render the grid of dynamic content.
Solution Details: Wrapping everything into a Webflow Symbol
The final step is to integrate all of this work and package it as a Webflow Symbol. This will allow the client to reuse this on any page that they choose to create in the future.
Integrate VueJs in Webflow
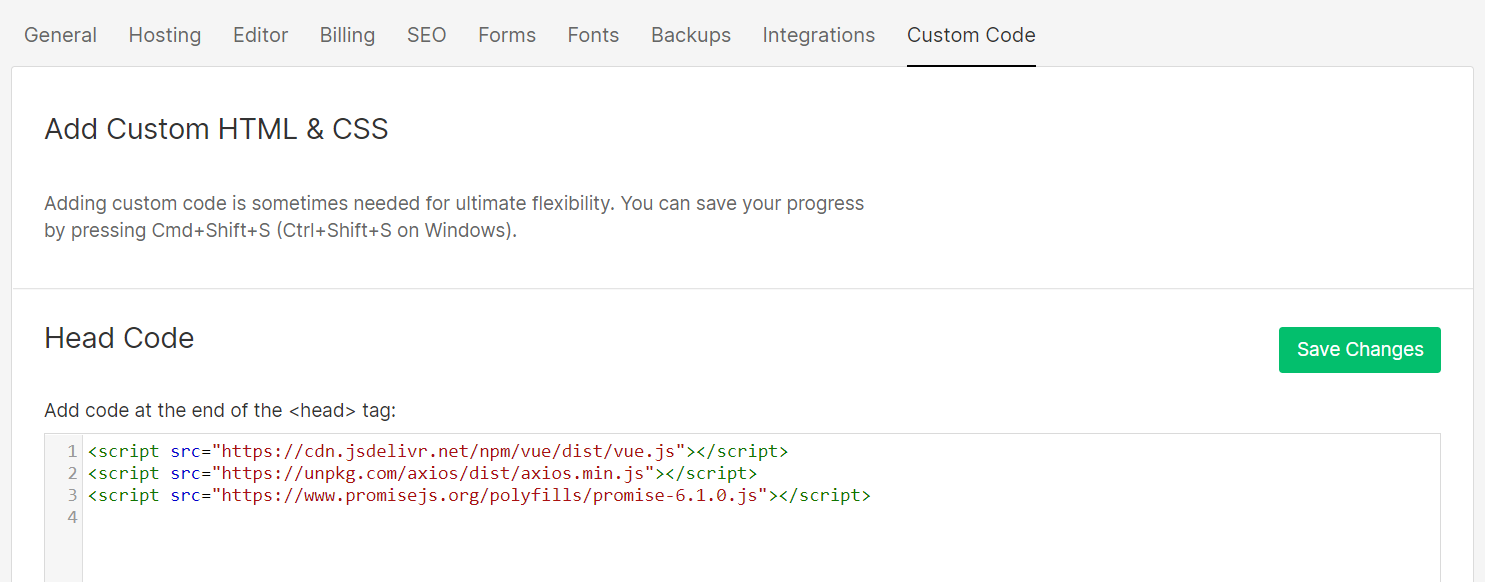
To Integrate VueJs and its features into wWbflow we need to add the following scripts in the header section of the site.
<script src="https://cdn.jsdelivr.net/npm/vue/dist/vue.js"></script>
<script src="https://cdnjs.cloudflare.com/ajax/libs/axios/0.26.1/axios.js"></script>
<script src="https://www.promisejs.org/polyfills/promise-6.1.0.js"></script>
Create an Embed HTML
The next step is to leverage the “Embed Code” widget in Webflow. Create a basic page in webflow and insert the following embed code.
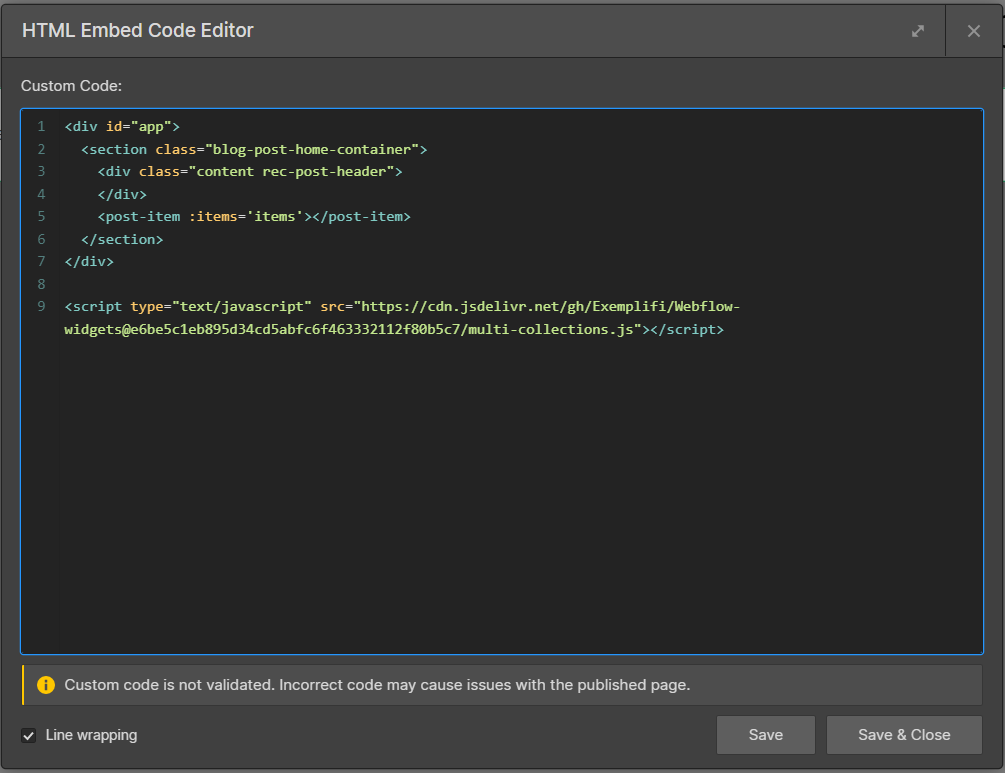
As you can see, the external Vue app is packaged and accessed through an external url
Save and publish the page. The page will now display the section as shown below

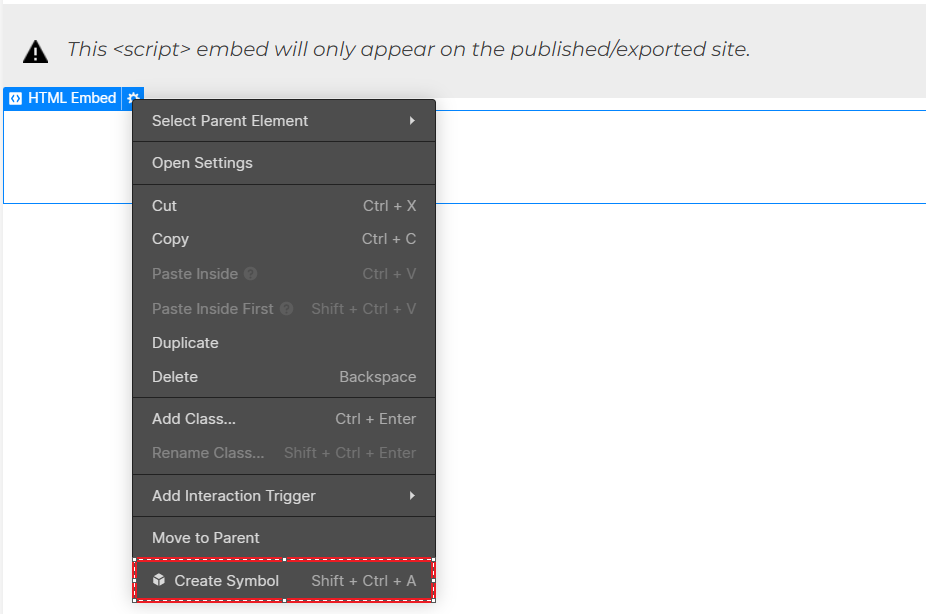
Creating A Symbol
The last step here is to convert this embed code widget into a symbol and save it in the library for future reuse.
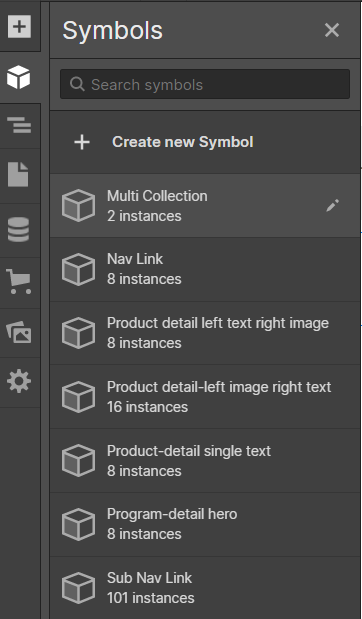
At this point you are ready! Just drag the symbol onto any page and see the section working!
Conclusion
As a proud Webflow expert partner ,we hope this insight was of help to you. At Exemplifi, we believe in sharing our work with the broader Webflow developer community. You can access all of this code at https://github.com/Exemplifi/Webflow-widgets.git.
If you liked this insight and want more updates, we’d love for you to join us on Linkedin at Exemplifi , Facebook at ExemplifiSites or Twitter at ExemplifiSites.